My nephew Liam took one sip of this milkshake, went completely silent for a solid ten seconds, and then asked if he could have it for breakfast. I mean, I couldn’t blame him—it really does taste that good. I had been messing around in the kitchen trying to capture that classic campfire flavor in a glass, and honestly, I wasn’t expecting much from my first attempt. But the way his eyes lit up? That told me everything I needed to know.
This Creamy Frozen S’mores Milkshake came together on a random Tuesday afternoon when the summer heat was absolutely brutal. I had a pint of vanilla ice cream melting on the counter, a half-empty bag of marshmallows from a camping trip we never took, and a chocolate bar I was saving for a rainy day. The craving hit me hard—that smoky-sweet, chocolatey, marshmallow pull you only get from a proper s’more. But I wasn’t about to build a fire in my kitchen (tempting, but no). So I threw everything into the blender, crossed my fingers, and hoped for the best.
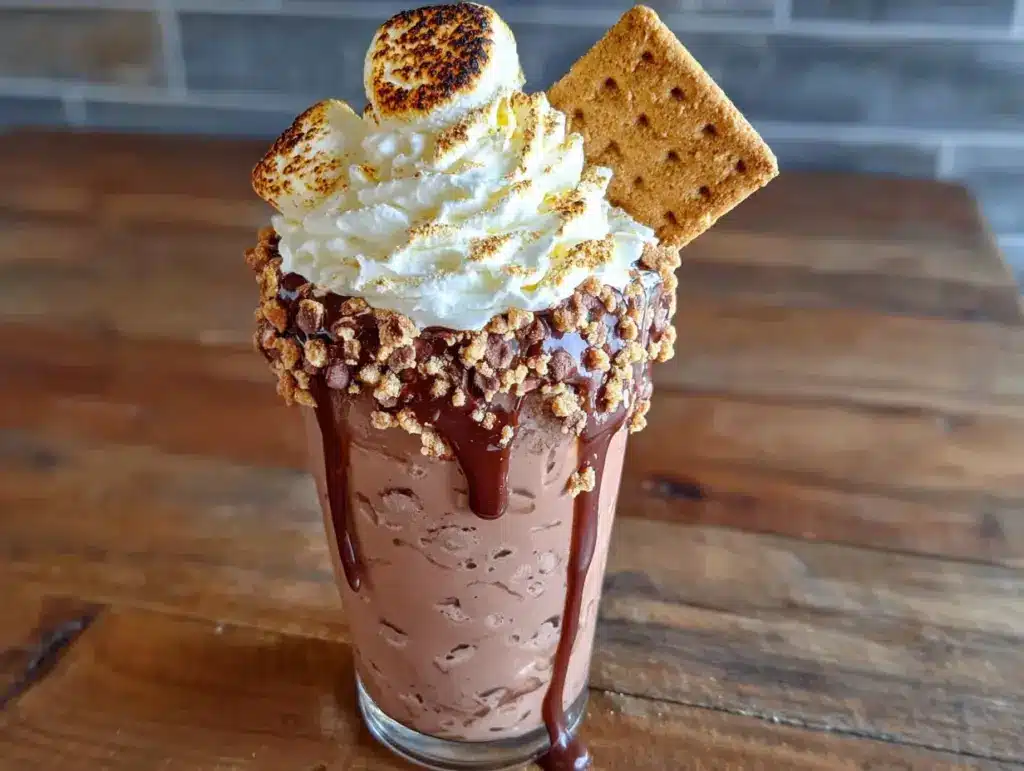
The result was this ridiculously creamy, deeply indulgent milkshake that somehow tastes exactly like sitting around a campfire. It’s cold and thick, with bits of crushed graham cracker floating through every sip and ribbons of melted marshmallow and chocolate swirled throughout. The first time I made it, I stood there drinking it straight from the blender jar. No shame. It’s one of those recipes that feels like a happy accident, but I’ve tweaked it enough times to know it works every single time now.
Why You’ll Love This Recipe
Let me tell you why this milkshake has become my go-to for pretty much every occasion. First off, it comes together in under five minutes. I’m not exaggerating—by the time you’ve gathered your ingredients, the blender does all the heavy lifting. No cooking, no waiting, no complicated steps. Just pure, instant gratification.
- Quick & Easy: From start to finish, you’re looking at about five minutes. Perfect for those moments when a craving hits hard and you need something now.
- Simple Ingredients: You probably already have most of these in your pantry. Ice cream, milk, chocolate syrup, marshmallows, graham crackers. That’s it. No fancy grocery store runs required.
- Perfect for Summer: When the temperature hits ninety and you can’t even think about turning on the oven, this milkshake is your best friend. It’s cooling, refreshing, and satisfies that sweet tooth without breaking a sweat.
- Crowd-Pleaser: I’ve served this at backyard barbecues, birthday parties, and lazy Sunday afternoons. Kids love it, adults sneak seconds, and everyone asks for the recipe. It’s one of those drinks that brings people together.
- Unbelievably Delicious: The texture is what gets me every time. It’s thick enough to eat with a spoon but drinkable through a straw, with little chunks of graham cracker and gooey marshmallow in every sip. It’s comfort food in a glass.
What makes this different from other s’mores milkshake recipes is the technique. I don’t just blend everything together and call it a day. I layer the ingredients in a specific way, toast the marshmallows just enough to get that smoky flavor without burning them, and use a trick with the chocolate syrup that creates those beautiful ribbons throughout the shake. It’s the little things that take this from good to absolutely unforgettable.
This is the kind of milkshake that makes you close your eyes after the first sip. It’s nostalgic and indulgent, but somehow feels special every single time. Whether you’re impressing guests at a party or treating yourself on a tough Tuesday, this recipe delivers.
What Ingredients You Will Need
This recipe uses simple, everyday ingredients to create something that tastes anything but ordinary. Here’s what you’ll need to grab:
For the Milkshake Base
- 2 cups vanilla ice cream (use a good quality brand like Häagen-Dazs or Tillamook for the creamiest texture—trust me, it matters)
- 1/2 cup whole milk (adds richness; you can use 2% or oat milk if needed, but whole milk gives that ultra-creamy consistency)
- 1/4 cup chocolate syrup (I prefer Hershey’s for the classic flavor, but any brand works—just make sure it’s thick, not watery)
- 1/2 cup mini marshmallows (plus extra for garnish—these blend in beautifully and add that gooey texture)
- 1/4 cup crushed graham crackers (about 2 full sheets, crushed into small pieces but not powder—you want some texture)
- 1 tablespoon chocolate chips (optional, but I love the extra chocolate chunks that don’t fully blend)
For the Toasted Marshmallow Topping
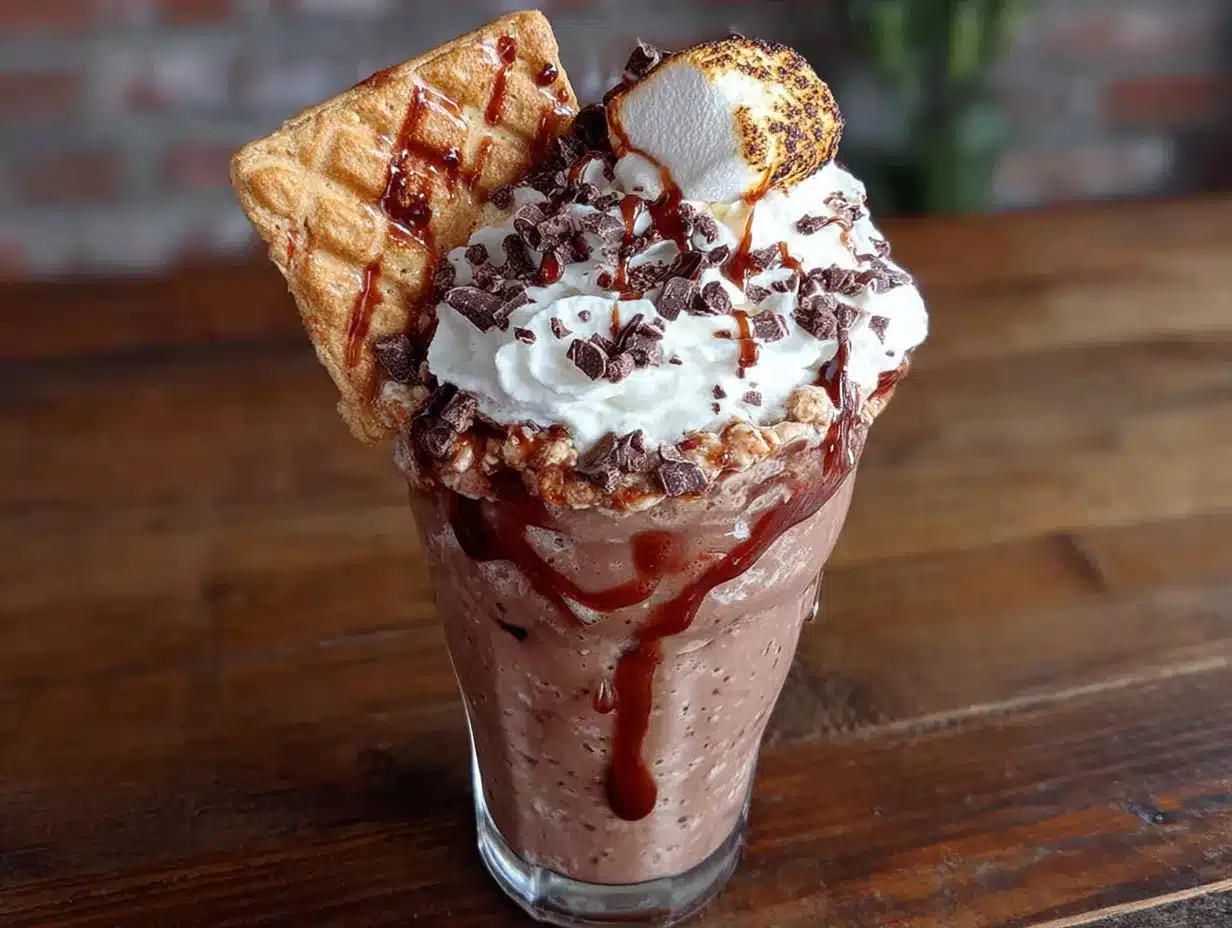
- 6-8 large marshmallows (for toasting on top—this is non-negotiable if you want that campfire vibe)
- 1 tablespoon graham cracker crumbs (for rimming the glass and sprinkling on top)
- Extra chocolate syrup (for drizzling inside the glass and on top)
A few notes on ingredient selection. For the ice cream, avoid the super cheap brands that are mostly air and stabilizers. You want something that’s actually creamy and will give you that thick, luxurious texture. If you’re dairy-free, there are some excellent oat milk and coconut milk ice creams out there—just make sure they’re vanilla flavored and full-fat for the best results.
The marshmallows are where the magic happens. Mini marshmallows blend more easily into the shake, but the large ones are perfect for toasting on top. If you can find them, jet-puffed marshmallows toast beautifully and get that golden-brown exterior without turning into a sticky mess.
For the graham crackers, I’ve tried this with honey flavored and cinnamon flavored, and honestly, both work great. The honey version gives a more classic s’mores taste, while cinnamon adds a little warmth that’s really nice in the fall. Just crush them by hand or in a zip-top bag with a rolling pin—you want some bigger pieces for texture.
Equipment Needed
You don’t need a lot of fancy equipment for this recipe, which is part of why I love it. Here’s what you’ll need:
- Blender: A high-speed blender works best, but any blender will do. I use a Vitamix and it makes the milkshake incredibly smooth in about 30 seconds. If you have a weaker blender, just blend in shorter bursts and scrape down the sides as needed.
- Measuring cups and spoons: Standard set for accurate measurements. Eyeballing works too, but for the best consistency, measure your ice cream and milk.
- Small skillet or kitchen torch: For toasting the marshmallows. If you don’t have a torch (I didn’t for years), a small non-stick skillet over medium heat works perfectly. You can also use the broiler setting on your oven—just watch them closely so they don’t burn.
- Tall glasses: 16-ounce glasses are perfect for this milkshake. The taller the glass, the more impressive the presentation.
- Straws: Thick milkshake straws are ideal, but you can also use a spoon. This milkshake is thick enough that a regular straw might struggle.
- Zip-top bag and rolling pin: For crushing graham crackers without making a mess. You can also use a food processor, but I find the bag method gives you more control over the texture.
If you don’t have a kitchen torch, don’t worry about it. I used a skillet for years and honestly, it gives you more even toasting anyway. Just make sure your skillet is dry and heat the marshmallows over medium heat, turning them frequently with tongs until they’re golden brown on all sides.
Preparation Method
Alright, let’s get to the good part. Here’s how to make this Creamy Frozen S’mores Milkshake step by step:
- Prepare your glasses. Start by rimming your glasses with chocolate syrup and graham cracker crumbs. Dip the rim of each glass in a shallow dish of chocolate syrup, then immediately dip it into a plate of graham cracker crumbs. Set the glasses aside while you make the milkshake. This little detail makes the presentation look professional and adds extra flavor with every sip.
- Toast the marshmallows. If you’re using a kitchen torch, place the large marshmallows on a skewer or hold them with tongs and torch them until they’re golden brown and slightly charred on the outside. If using a skillet, place the marshmallows in a dry non-stick skillet over medium heat. Cook for about 2-3 minutes, turning frequently, until they’re puffed up and golden brown on all sides. Be careful not to burn them—they go from perfect to black in seconds. Set them aside to cool slightly while you make the shake.
- Crush the graham crackers. Place 2 full sheets of graham crackers in a zip-top bag and seal it. Use a rolling pin or the bottom of a heavy glass to crush them into small pieces. You want a mix of fine crumbs and small chunks—not powder. Set aside about 1 tablespoon for garnish.
- Layer the ingredients in the blender. Start with the milk at the bottom (this helps everything blend more easily). Add the vanilla ice cream, chocolate syrup, mini marshmallows, crushed graham crackers, and chocolate chips if you’re using them. Don’t just dump everything in—layering helps the blender work more efficiently and ensures everything gets evenly incorporated.
- Blend until smooth. Start on low speed and gradually increase to high. Blend for about 30-45 seconds, until the mixture is smooth and creamy. You should see small flecks of graham cracker throughout, but no large chunks of marshmallow should remain. If the shake is too thick, add an extra tablespoon of milk and blend again. If it’s too thin, add a scoop of ice cream.
- Taste and adjust. This is the most important step. Dip a spoon in and taste it. Does it need more chocolate? More marshmallow? A pinch of salt can actually bring out all the flavors beautifully—I sometimes add a tiny pinch of sea salt if the shake tastes too sweet. Adjust to your preference.
- Assemble the milkshake. Pour the milkshake into your prepared glasses, filling them about three-quarters full. Drizzle extra chocolate syrup around the inside of the glass before pouring for a beautiful marbled effect. Top with the toasted marshmallows—you can either place them on top whole or tear them in half for a more rustic look.
- Add the finishing touches. Sprinkle the reserved graham cracker crumbs over the top. Add a final drizzle of chocolate syrup. If you’re feeling extra fancy, you can add a dollop of whipped cream underneath the marshmallows. Serve immediately with a thick straw and a spoon.
One thing I’ve learned the hard way—don’t let the milkshake sit too long after you make it. The toasted marshmallows will start to soften and melt into the shake, which isn’t necessarily a bad thing, but you want to enjoy it at its peak. This is definitely a drink you make and enjoy right away.
Cooking Tips & Techniques
After making this milkshake probably fifty times (no exaggeration), I’ve picked up a few tricks that make a real difference. Let me share them with you.
The ice cream temperature matters. If your ice cream is rock hard straight from the freezer, let it sit on the counter for about 5 minutes before blending. This makes it easier on your blender and gives you a smoother consistency. If it’s too soft, you’ll end up with a thin, soupy shake. You want it firm but scoopable—that Goldilocks zone where it’s soft enough to blend but cold enough to stay thick.
Toast the marshmallows right before serving. I learned this one the hard way. If you toast them too early, they deflate and lose that beautiful puffy texture. Toast them while the blender is running, or right before you pour the shake. They’re best when they’re still warm and slightly gooey on the inside.
Don’t over-blend. This is probably the most common mistake people make. You want the graham crackers to stay in small pieces, not get pulverized into dust. Pulse the blender a few times at the end to check the texture. You should see visible bits of graham cracker throughout. If everything looks uniform, you’ve gone too far.
Use a chilled glass. Pop your glasses in the freezer for 10 minutes before serving. This keeps the milkshake cold longer and prevents it from melting too quickly. It’s a small step that makes a noticeable difference, especially on hot summer days.
Layer the chocolate syrup. Instead of just mixing it all in, try drizzling chocolate syrup around the inside of the glass before pouring the shake. As you pour, the syrup creates beautiful ribbons that stay visible. It looks gorgeous and gives you little pockets of pure chocolate in every sip.
One of my biggest failures with this recipe happened when I tried to make it dairy-free for a friend. I used coconut milk ice cream and oat milk, and the texture was… not great. It was icy and separated weirdly. After some trial and error, I found that full-fat oat milk ice cream works best, and adding a frozen banana helps with creaminess. So if you’re going dairy-free, keep that in mind.
Variations & Adaptations
This milkshake is incredibly versatile, and I’ve experimented with quite a few variations over the years. Here are some of my favorites:
Peanut Butter S’mores Milkshake: Add 2 tablespoons of creamy peanut butter to the blender along with the other ingredients. The peanut butter adds a savory richness that pairs beautifully with the chocolate and marshmallow. My husband insists this is the only way to make it now.
Mint Chocolate S’mores Milkshake: Swap the chocolate syrup for mint chocolate syrup and add a few drops of peppermint extract. Top with crushed Andes mints instead of graham crackers. This is dangerously good and tastes like a Thin Mint in milkshake form.
Vegan S’mores Milkshake: Use full-fat oat milk or coconut milk ice cream, and swap the whole milk for oat milk or almond milk. Use vegan marshmallows (Dandies brand works great) and dairy-free chocolate syrup. The texture won’t be quite as creamy, but it’s still incredibly satisfying.
Spiked Adult S’mores Milkshake: Add 2 ounces of bourbon or dark rum to the blender. The smoky notes in the bourbon complement the toasted marshmallow flavor beautifully. This is my go-to for adult gatherings and it always gets rave reviews.
Berry S’mores Milkshake: Add a handful of fresh raspberries or strawberries to the blender. The tartness cuts through the sweetness and adds a bright, fruity element that’s really lovely. I discovered this variation by accident when I had leftover berries in the fridge, and now I make it on purpose all the time.
For a fun twist, try making this as a milkshake float instead. Blend the milkshake as directed, then pour it into a glass and top with a scoop of vanilla ice cream and a splash of root beer or cream soda. The carbonation adds a fun fizz that’s surprisingly delicious with the s’mores flavors.
Serving & Storage Suggestions
This milkshake is best served immediately, but I’ve got some tips for making the most of it.
Serving temperature: Serve it as cold as possible. I like to keep my glasses in the freezer for at least 15 minutes before serving. The milkshake should be thick enough that you need a spoon to eat it, but thin enough to drink through a straw. If it’s too thick, add a splash of milk and stir.
Presentation: For the full effect, serve in tall glasses with the toasted marshmallows piled on top. Add a long straw and a spoon on the side. If you’re serving at a party, you can set up a toppings bar with extra graham cracker crumbs, chocolate chips, and different types of marshmallows so guests can customize their own.
Complementary dishes: This milkshake pairs beautifully with salty snacks. Think pretzels, potato chips, or salted nuts. The salt cuts through the sweetness and creates that perfect sweet-salty balance. For a full dessert spread, serve alongside salted caramel hot chocolate for a cozy night in.
Storage: Honestly, this milkshake doesn’t store well. The texture changes as it melts, and the toasted marshmallows get soggy. If you absolutely must save some, pour it into an airtight container and freeze for up to 24 hours. When you’re ready to enjoy it, let it sit at room temperature for about 10 minutes, then give it a good stir. The texture won’t be the same, but it’s still tasty.
Reheating: You don’t reheat a milkshake, but if you’ve frozen it, you can let it thaw slightly and then re-blend it with a splash of milk to bring back some of the creaminess. Just don’t expect it to be as good as fresh.
One thing I love about this recipe is that the flavors actually get better after about 5 minutes in the glass. The marshmallow starts to soften and meld with the chocolate, and the graham cracker bits absorb some of the liquid, creating this wonderful texture. So if you can resist drinking it immediately, give it a minute to settle.
Nutritional Information & Benefits
Let’s be real here—this is a treat, not a health drink. But that doesn’t mean it’s completely devoid of nutritional value. Here’s what you’re looking at per serving (based on one 16-ounce milkshake):
| Nutrient | Amount per Serving |
|---|---|
| Calories | 580 |
| Total Fat | 28g |
| Saturated Fat | 16g |
| Cholesterol | 95mg |
| Sodium | 320mg |
| Total Carbohydrates | 78g |
| Dietary Fiber | 2g |
| Sugars | 55g |
| Protein | 9g |
| Calcium | 250mg |
Now, let’s talk about what’s actually good in here. The milk and ice cream provide calcium and vitamin D, which are important for bone health. The graham crackers offer a small amount of whole grains and fiber. And the chocolate? Well, dark chocolate does contain antioxidants, but we’re using syrup here, so let’s not kid ourselves.
If you’re looking to make this a bit lighter, you can use low-fat ice cream and skim milk, but honestly, the texture won’t be the same. I’d rather have a smaller serving of the real thing than a giant glass of something that doesn’t satisfy. This milkshake is about indulgence, and sometimes that’s exactly what you need.
For those with dietary restrictions, this recipe contains dairy, gluten (from the graham crackers), and soy (in some chocolate syrups). Use certified gluten-free graham crackers if needed, and check your chocolate syrup for allergens. The vegan variation I mentioned earlier works well for those avoiding animal products.
Conclusion
This Creamy Frozen S’mores Milkshake has become a staple in my house for good reason. It captures everything I love about summer—the warmth of a campfire, the sweetness of toasted marshmallows, the crunch of graham crackers—and turns it into something you can enjoy any time of year. It takes five minutes, uses ingredients you probably already have, and delivers a flavor experience that feels way more special than it should for how simple it is.
I love this recipe because it’s forgiving. You can tweak it, adjust it, make it your own. Maybe you want extra chocolate, or you’re in the mood for a peanut butter twist, or you want to spike it for a grown-up gathering. It works every time. And honestly, watching someone take their first sip and seeing that little smile spread across their face? That never gets old.
So go ahead and give it a try. Make it for yourself on a hot afternoon, surprise your kids after school, or serve it at your next backyard barbecue. I’d love to hear how it turns out for you. Drop a comment below and let me know what variations you tried, or tag me in your photos. And if you’re looking for more summer drink inspiration, check out this frozen strawberry daiquiri or this strawberry basil mimosa for more refreshing options. Happy blending!
Frequently Asked Questions
Can I make this milkshake ahead of time?
I wouldn’t recommend it. This milkshake is best enjoyed immediately after making it. The texture changes as it sits, and the toasted marshmallows lose their puffiness. If you need to prep ahead, you can measure out your ingredients and have everything ready to go, but wait to blend and assemble until just before serving.
How do I get the milkshake extra thick?
Use less milk and more ice cream. Start with 1/3 cup of milk instead of 1/2 cup, and add an extra scoop of ice cream. You can also freeze your glass beforehand and use ice cream that’s slightly softened but still firm. If it’s too thick after blending, just add a splash more milk and pulse again.
Can I use a different type of chocolate?
Absolutely. Dark chocolate syrup gives a richer, less sweet flavor. You can also melt actual chocolate bars (about 2 ounces) and use that instead of syrup—just let it cool slightly before adding it to the blender so it doesn’t melt the ice cream. White chocolate syrup is also delicious and gives the milkshake a different vibe entirely.
What if I don’t have graham crackers?
You can use vanilla wafers, shortbread cookies, or even crushed pretzels for a sweet-salty twist. Digestive biscuits work well too if you’re outside the US. The key is something with a similar texture and mild flavor that will complement the chocolate and marshmallow without overpowering them.
How many servings does this recipe make?
This recipe makes two 16-ounce milkshakes, which is perfect for sharing. If you’re serving a crowd, you can easily double or triple the recipe. Just make sure your blender is big enough to handle the volume—you might need to blend in batches if you’re making a large quantity.
Pin This Recipe!
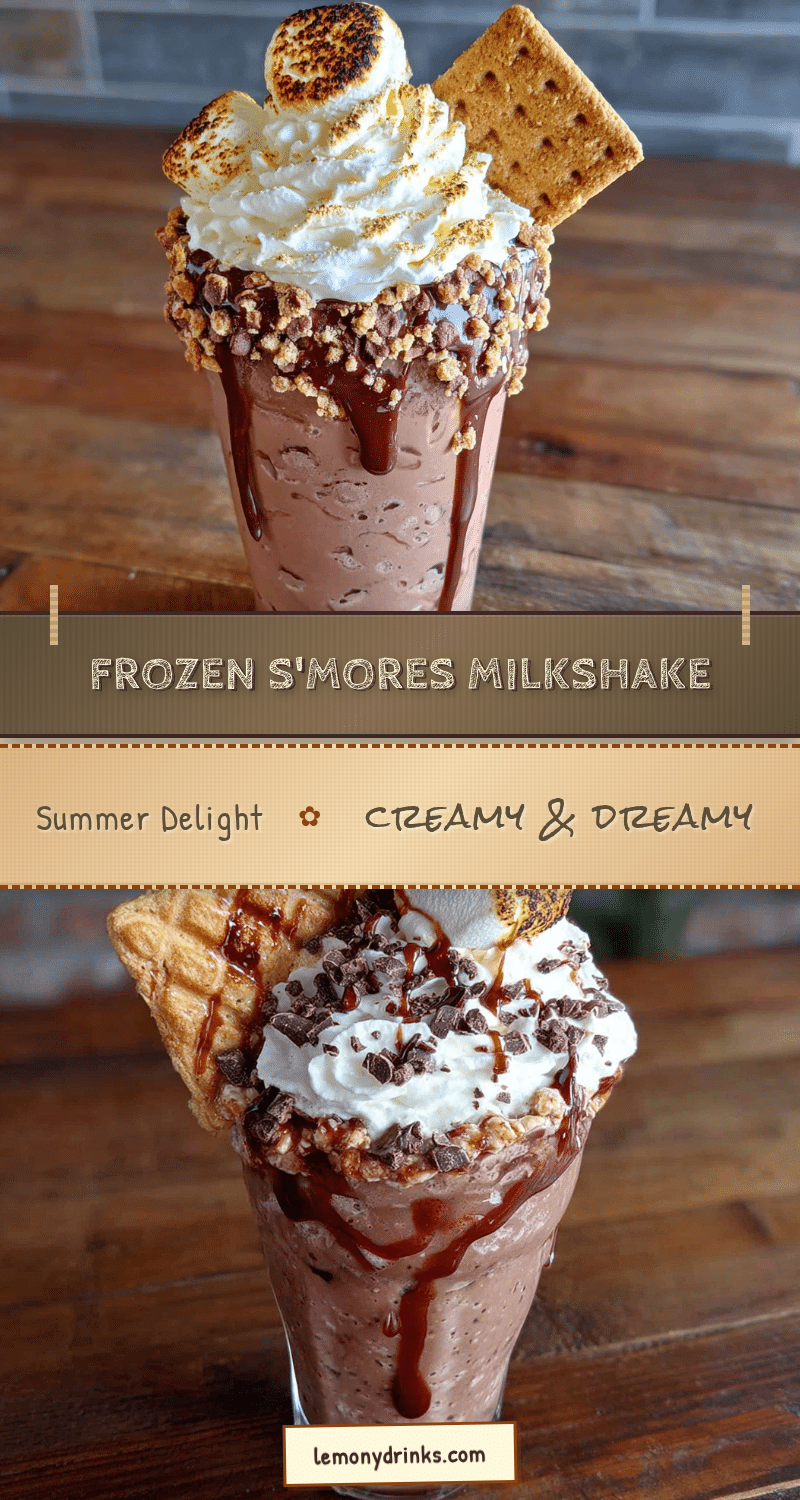
Creamy Frozen Smores Milkshake (Easy 5-Minute Recipe)
This ridiculously creamy, deeply indulgent milkshake tastes exactly like sitting around a campfire. It’s cold and thick, with bits of crushed graham cracker floating through every sip and ribbons of melted marshmallow and chocolate swirled throughout.
- Prep Time: 5 minutes
- Cook Time: 3 minutes
- Total Time: 8 minutes
- Yield: 2 servings 1x
- Category: Dessert
- Cuisine: American
Ingredients
- 2 cups vanilla ice cream
- 1/2 cup whole milk
- 1/4 cup chocolate syrup
- 1/2 cup mini marshmallows
- 1/4 cup crushed graham crackers (about 2 full sheets)
- 1 tablespoon chocolate chips (optional)
- 6–8 large marshmallows (for topping)
- 1 tablespoon graham cracker crumbs (for rimming and garnish)
- Extra chocolate syrup (for drizzling)
Instructions
- Prepare your glasses by rimming them with chocolate syrup and graham cracker crumbs. Dip the rim of each glass in a shallow dish of chocolate syrup, then immediately dip it into a plate of graham cracker crumbs. Set aside.
- Toast the marshmallows. Using a kitchen torch, place the large marshmallows on a skewer or hold them with tongs and torch until golden brown and slightly charred. Alternatively, place marshmallows in a dry non-stick skillet over medium heat, turning frequently, for 2-3 minutes until puffed and golden. Set aside to cool slightly.
- Crush the graham crackers. Place 2 full sheets in a zip-top bag and crush with a rolling pin into small pieces (not powder). Reserve about 1 tablespoon for garnish.
- Layer ingredients in the blender: start with milk at the bottom, then add vanilla ice cream, chocolate syrup, mini marshmallows, crushed graham crackers, and chocolate chips (if using).
- Blend on low speed, gradually increasing to high, for 30-45 seconds until smooth and creamy. If too thick, add an extra tablespoon of milk; if too thin, add more ice cream.
- Taste and adjust. Add a pinch of sea salt if too sweet, or more chocolate or marshmallow as desired.
- Assemble the milkshake: pour into prepared glasses, filling three-quarters full. Drizzle extra chocolate syrup around the inside of the glass before pouring for a marbled effect. Top with toasted marshmallows.
- Add finishing touches: sprinkle reserved graham cracker crumbs over the top, add a final drizzle of chocolate syrup, and optionally add whipped cream. Serve immediately with a thick straw and spoon.
Notes
For best results, use good quality vanilla ice cream (like Häagen-Dazs or Tillamook). Toast marshmallows right before serving to maintain puffiness. Don’t over-blend; graham cracker pieces should remain visible. Chill glasses in freezer for 10 minutes before serving to keep milkshake cold longer. This milkshake is best enjoyed immediately.
Nutrition
- Serving Size: 1 milkshake (16 ounc
- Calories: 580
- Sugar: 55
- Sodium: 320
- Fat: 28
- Saturated Fat: 16
- Carbohydrates: 78
- Fiber: 2
- Protein: 9
Keywords: smores milkshake, creamy milkshake, easy milkshake, summer dessert, campfire milkshake, chocolate marshmallow milkshake