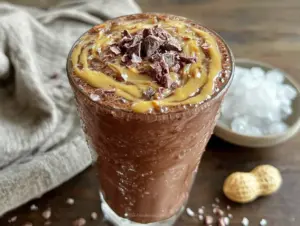
Okay, real talk—you know those days when all you want is something ridiculously indulgent? Like, you’re craving dessert and a pick-me-up, and you don’t want to fuss with baking or waiting for anything to chill? That’s exactly where my obsession with the Chocolate Hazelnut Crunch Milkshake started. I was having one of those “treat yourself” afternoons (you know, a cozy hoodie, Netflix marathon, and zero plans), and I just wanted something cold, creamy, and a little bit extra.
It all began one summer when my best friend and I raided my pantry for anything sweet. We stumbled on a jar of chocolate hazelnut spread, some leftover ice cream, and—for the crunch factor—those chocolate-covered wafer cookies that are honestly dangerous to have around. The first sip was like a hug in a glass, no joke. Ever since, this has been my go-to for dessert cravings, movie nights, or when I want to impress friends without actually working hard.
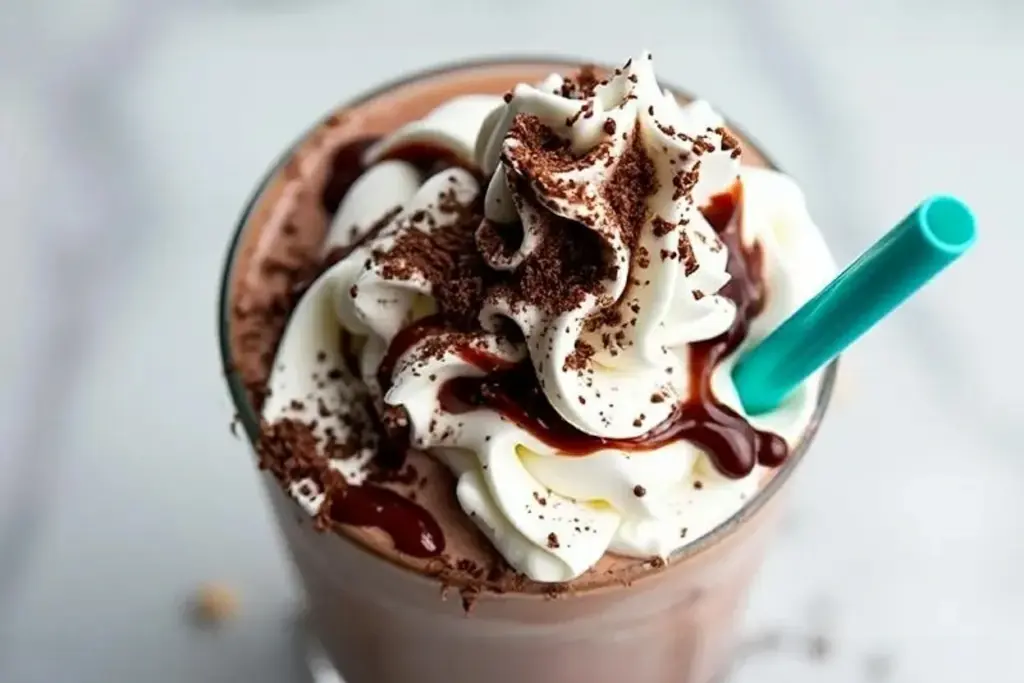
If you love chocolate shakes, this one takes things to the next level. It’s creamy, crunchy, chocolatey, and has that nutty hazelnut kick. Plus, it’s super photogenic—hello, Pinterest-worthy swirls! Seriously, if you’re a fan of Nutella, Ferrero Rocher, or just shakes that feel a little over-the-top, you’re going to be obsessed with this Chocolate Hazelnut Crunch Milkshake. Let me walk you through my favorite way to make it at home!
The Inspiration Behind the Chocolate Hazelnut Crunch Milkshake
So, where did the idea for this milkshake come from? If I’m being honest, I’ve always been a sucker for anything with chocolate and hazelnuts. I mean, who can resist that classic combo? It’s the heart and soul of so many dreamy desserts, from Italian gianduja to those iconic golden-wrapped candies (you know the ones I’m talking about!).
My inspiration for this milkshake is really a mashup of childhood nostalgia and adult-level dessert cravings. Growing up, my family used to keep a jar of chocolate hazelnut spread on the breakfast table. I’d sneak spoonfuls when no one was looking (I still do, sometimes). Later, I discovered how magical it tastes blended with ice cream and milk—the ultimate upgrade from a basic chocolate shake.
The “crunch” part happened by accident, honestly. I was looking for something to sprinkle on top, and chopped up a few chocolate wafer cookies. It was a game-changer! Now, I can’t imagine this milkshake without a little crunchy surprise in every sip. Trust me, it’s the difference between a good shake and an unforgettable one.
Honestly, this shake is perfect any time you want to treat yourself or impress a friend. I love making it for birthdays, date nights at home, or just when I want something sweet and special. It’s a total crowd-pleaser and looks amazing in photos (so if you’re a Pinterest fan, this one’s for you!).
What Ingredients You’ll Need for the Best Chocolate Hazelnut Crunch Milkshake
Let’s get to the good stuff: what makes this milkshake so epic? The ingredients are simple, but each one totally matters. Here’s what you’ll need and why I love using them:
- Chocolate Hazelnut Spread (like Nutella): This is the star of the show. It adds chocolate richness and that nutty, creamy flavor. I’ve tried a few brands, and honestly, they all work—but go with your favorite!
- Vanilla Ice Cream: The base of the milkshake. I like a classic, creamy vanilla because it lets the chocolate hazelnut shine. If you want it even richer, try chocolate or chocolate chip ice cream.
- Milk: Regular whole milk makes it super creamy, but you can totally use 2%, skim, or even an almond/oat milk if you want it dairy-free. Just keep in mind, the thicker the milk, the creamier the shake.
- Chocolate Wafer Cookies or Biscuits: This is where the crunch comes in. I love using chocolate-covered wafer cookies, but honestly, any crunchy chocolate cookie will do—think Oreos, graham crackers, or even granola for a twist.
- Ice Cubes (optional): If you want a thicker, frostier shake, toss in a few ice cubes. I do this on hot days!
- Whipped Cream (for topping): It’s not required, but it turns your milkshake into a true dessert. I always add a swirl on top.
- Chopped Hazelnuts: For extra crunch and a little fancy touch, sprinkle some on top. You can find these in the baking aisle, or just chop your own.
- Chocolate Syrup (optional): Drizzle it inside your glass or on top for those extra Pinterest vibes. Totally optional, but it makes the shake look and taste even more decadent.
If you don’t have all of these, don’t stress! I’ve made this with just ice cream, milk, and chocolate hazelnut spread, and it’s still amazing. The cookies and nuts just bring that wow factor. The best part? You can adjust everything to your taste—make it as chocolatey, nutty, or crunchy as you want!
Pro tip: Check the international foods section for unique chocolate hazelnut spreads or fun cookies to try. Sometimes the off-brand stuff is even better than the name-brand. And if you’re feeling adventurous, try adding a pinch of sea salt or a drop of espresso for a grown-up twist. So good!
Equipment & Tools You Actually Need
Good news: making a Chocolate Hazelnut Crunch Milkshake doesn’t require any fancy gadgets. Here’s what I use every time:
- Blender: Any blender works. I use a basic countertop one, but even an immersion blender in a tall cup will do the trick. No need for anything high-tech.
- Measuring Cups: For the ice cream, milk, and spread. But honestly, I eyeball it most of the time—just don’t go overboard with the milk or it’ll get too thin.
- Glasses: Go for something tall and clear to show off those layers and swirls. Mason jars or milkshake glasses look super cute.
- Spoon or Spatula: For scooping out the ice cream and spreading that chocolate hazelnut goodness.
- Optional: Ice Cream Scoop: Makes things easier, but a big spoon works too.
If you don’t have a blender, you can mash the ice cream and mix everything by hand. It won’t be as smooth, but it’ll still taste great. Trust me, I’ve tried when my blender was on the fritz!
How to Make a Chocolate Hazelnut Crunch Milkshake (Step-by-Step)
- Scoop the Ice Cream: Add about 2-3 generous scoops (roughly 1.5 cups) of vanilla ice cream to your blender. If you want it extra thick, use more ice cream and less milk.
- Add the Chocolate Hazelnut Spread: Spoon in 2-3 tablespoons of your favorite chocolate hazelnut spread. Don’t be shy here—the more, the richer!
- Pour in the Milk: Add about 1/2 cup of milk to start. You can always add more if it’s too thick, but you can’t take it out! Start slow.
- Crush and Add the Cookies: Break up 2-3 chocolate wafer cookies and toss them in. If you want the crunch to be more subtle, blend them in now. For chunkier bits, stir them in later.
- Optional: Toss in Ice Cubes: If you like a frostier shake, add 2-3 ice cubes. Totally up to you—skip it if you like it smooth.
- Blend It Up: Pop the lid on and blend everything until smooth and creamy. If it’s too thick for your liking, splash in a bit more milk and blend again. If it’s too thin, add more ice cream or a few ice cubes.
- Taste Test: Give it a quick taste. Want it more chocolatey? Add another spoonful of hazelnut spread. More crunch? Toss in another cookie.
- Prep Your Glass: If you’re feeling fancy, drizzle chocolate syrup inside your glass and swirl it around before pouring in the shake. It makes it look super pretty (and chocolatey!).
- Pour and Top: Pour your milkshake into the glass. Top with a big swirl of whipped cream, a sprinkle of chopped hazelnuts, and maybe an extra cookie or a drizzle of chocolate syrup if you’re going all out.
- Serve Immediately: This is a drink you want to enjoy right away while it’s cold, creamy, and the cookies are still crunchy.
If your blender gets stuck, stop and give it a stir. Sometimes thick shakes need a little help. And don’t stress if it’s not perfectly smooth—those little chunks of cookie are the best part!
Honestly, once you make this a couple of times, you’ll be able to eyeball everything and make it your own. It’s almost impossible to mess up, and even the “mistakes” taste amazing.
Tips & Tricks for a Next-Level Chocolate Hazelnut Crunch Milkshake
- Don’t Overdo the Milk: Start with less and add more as needed. Too much milk makes it thin, and you want it thick and dreamy.
- Use Super Cold Ingredients: If your ice cream is soft, pop it in the freezer for a bit before blending. Cold ingredients = thicker shake.
- Add the Crunch Last: For max crunch, stir in extra cookie pieces after blending. If you blend them too much, they’ll disappear.
- Make It Decadent: Layer some chocolate syrup or extra hazelnut spread at the bottom of the glass before pouring in the shake. It looks amazing and adds bonus flavor at the end.
- Go Nutty: Toast your hazelnuts before chopping for a deeper flavor—just a few minutes in a dry pan, watching closely so they don’t burn. So good!
- Cleanup Tip: Rinse your blender right away. Dried milkshake is a pain to clean, trust me.
- Accidentally too thin? No worries—add more ice cream or a handful of ice and blend again. Too thick? Just a splash more milk. This recipe is super forgiving.
One time I totally forgot to buy cookies, so I used granola instead for the crunch. It was actually amazing! So don’t be afraid to improvise with what you have. Sometimes the best versions happen by accident.
Variations & Customizations: Make It Your Own
This is one of those recipes you can totally play with, depending on your cravings or what’s in your pantry. Here are some fun ways to mix it up:
- Make It Dairy-Free: Use your favorite dairy-free ice cream and plant-based milk. Almond milk and coconut milk both work great, and there are tons of good dairy-free chocolate hazelnut spreads out there now.
- Switch Up the Ice Cream: Try chocolate, coffee, or even hazelnut ice cream for extra flavor. Cookies and cream is amazing too.
- Use Different Crunch: Not a fan of chocolate wafers? Swap in graham crackers, pretzels, or even chopped candy bars. I once tried honey-roasted peanuts for a salty twist—so good!
- Go Extra Chocolatey: Add a tablespoon of cocoa powder or chocolate chips to the blender for a double-chocolate punch.
- Make It Boozy: For adults, add a splash of hazelnut liqueur (like Frangelico) or a bit of chocolate liqueur. Instant dessert cocktail vibes!
One of my favorite customizations? Swapping the cookies for a handful of salted pretzels. Trust me, the sweet and salty combo is next-level. Don’t be afraid to experiment—you can’t really go wrong with chocolate and hazelnuts!
Serving & Storage: The Best Way to Enjoy
The Chocolate Hazelnut Crunch Milkshake is definitely best served right away, while it’s still super cold and those crunchy bits are fresh. Pour it into a tall, chilled glass (I sometimes pop my glasses in the freezer for a few minutes first—feels so special!).
Top with whipped cream, extra chopped hazelnuts, and maybe a chocolate wafer stuck in the side for that “wow” factor. If you want it extra photogenic for Pinterest, drizzle a little chocolate syrup on top or run it down the inside of the glass before pouring in the shake.
If you do have leftovers (rare, trust me), pop them in an airtight jar and freeze. When you’re ready for round two, let it sit at room temp for 10-15 minutes and give it a good stir. The texture won’t be quite as perfect, but it’ll still taste amazing. I wouldn’t keep it more than a day or two since the cookies get soggy, but it rarely lasts that long!
Health Benefits (Because Why Not?)
Okay, it’s a dessert milkshake, so let’s not pretend it’s health food. But there are a few silver linings! Hazelnuts are packed with healthy fats, vitamin E, and magnesium. Using real milk (or fortified plant milk) means some calcium and protein, too. If you make it with dairy-free or lower-sugar options, you can tweak it to fit different diets.
Chocolate can be a little mood booster (I swear I feel happier after a chocolate shake!). And hey, making your own shakes at home lets you control the ingredients, which is always a win.
Of course, everything in moderation. But honestly? Sometimes a treat is just good for the soul.
FAQs About Chocolate Hazelnut Crunch Milkshake
What’s the best ice cream to use for this milkshake?
I love classic vanilla because it lets the chocolate hazelnut flavor shine, but chocolate or hazelnut ice cream is also amazing. Go with your favorite, and don’t be afraid to mix it up!
Can I make this milkshake without a blender?
Totally! Just let the ice cream soften a bit, then mash everything together with a spoon or whisk. It won’t be as smooth, but it’ll still taste fantastic.
What if I don’t have chocolate wafer cookies?
No worries! You can use any crunchy chocolate cookie, graham crackers, granola, or even pretzels for a salty twist. Get creative with what you have on hand.
How do I make this milkshake dairy-free?
Use your favorite dairy-free ice cream (like almond or coconut-based) and plant-based milk. There are even dairy-free chocolate hazelnut spreads available now!
Can I make this ahead of time?
It’s best fresh, but you can blend it and freeze for later. Let it thaw a bit before serving and give it a good stir. The crunch might soften, but the flavor will still be delicious.
If you’re a chocolate or hazelnut lover, you seriously need to try this Chocolate Hazelnut Crunch Milkshake. It’s easy, fun, and feels like a mini celebration every time you make it. Let me know if you put your own spin on it—I love hearing your ideas!
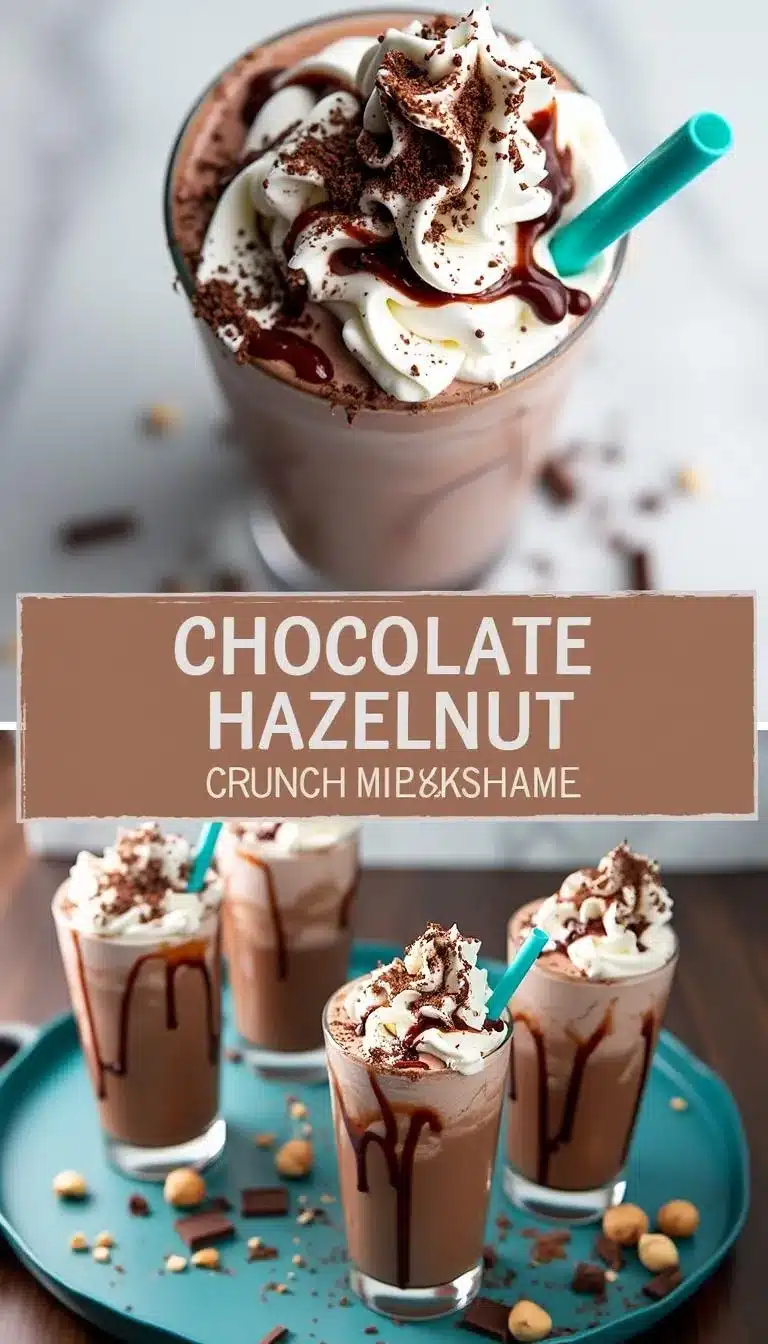
Chocolate Hazelnut Crunch Milkshake
This decadent milkshake blends creamy vanilla ice cream, chocolate hazelnut spread, and crunchy chocolate wafer cookies for a dessert that’s rich, nutty, and irresistibly photogenic. It’s the perfect treat for movie nights, celebrations, or anytime you want to indulge without fuss.
- Prep Time: 5 minutes
- Total Time: 5 minutes
- Yield: 2 servings 1x
- Category: Milkshake
Ingredients
- 1.5 cups vanilla ice cream (about 2–3 generous scoops)
- 2–3 tablespoons chocolate hazelnut spread (such as Nutella)
- 1/2 cup whole milk (or plant-based milk for dairy-free)
- 2–3 chocolate wafer cookies or biscuits (such as chocolate-covered wafers, Oreos, or graham crackers)
- 2–3 ice cubes (optional, for a thicker shake)
- Whipped cream (for topping)
- 2 tablespoons chopped hazelnuts (for topping)
- Chocolate syrup (optional, for drizzling)
Instructions
- Add vanilla ice cream to the blender.
- Spoon in chocolate hazelnut spread.
- Pour in milk, starting with 1/2 cup.
- Break up chocolate wafer cookies and add to the blender (blend for subtle crunch, or stir in later for chunkier bits).
- Add ice cubes if you want a thicker, frostier shake.
- Blend until smooth and creamy. Adjust thickness by adding more milk or ice cream as needed.
- Taste and adjust: add more hazelnut spread for richness or more cookies for crunch.
- Drizzle chocolate syrup inside your glass for extra decadence (optional).
- Pour milkshake into glass. Top with whipped cream, chopped hazelnuts, and extra cookie or chocolate syrup if desired.
- Serve immediately while cold and crunchy.
Notes
Start with less milk for a thicker shake and add more as needed. For maximum crunch, stir in extra cookie pieces after blending. Toast hazelnuts for deeper flavor. Use super cold ingredients for best texture. Dairy-free and vegan options are easy with plant-based ice cream and milk.
Nutrition
- Serving Size: 1 large glass
- Calories: 520
- Sugar: 48
- Sodium: 160
- Fat: 28
- Saturated Fat: 14
- Carbohydrates: 62
- Fiber: 3
- Protein: 8
Keywords: chocolate hazelnut milkshake, Nutella shake, crunchy milkshake, dessert drink, easy milkshake recipe, Ferrero Rocher milkshake, chocolate shake, hazelnut dessert, summer treat, party milkshake