Okay, you guys, let’s talk about Dreamy Mocha Cheesecake Magic. I’m not exaggerating when I say this is the dessert I keep coming back to. The first time I made this, it was for a last-minute get-together with friends who claim they “aren’t dessert people.” (Spoiler: they devoured it.) There’s something about the combo of rich chocolate, creamy cheesecake, and the subtle kick of coffee that just… works. Honestly, I wish I had known about this recipe years ago because it would’ve saved me from a lot of dessert disasters.
If you’re a lover of all things chocolate and coffee, this mocha cheesecake is going to steal your heart. It’s got that decadent, velvety texture and a flavor that makes you want to savor every single bite. Whether you’re making it for a celebration, a random Tuesday night, or just because you need a little pick-me-up, this dessert always hits the spot. Trust me, there’s a reason I call it “magic” – it’s a sweet treat that never disappoints.
So, if you’ve ever wanted a show-stopping dessert that feels fancy but is totally doable in your own kitchen, stick with me. I’ll walk you through all the nitty-gritty details, share some personal mishaps (because, well, cheesecake can be a little wild sometimes), and give you all my tips for nailing the perfect mocha cheesecake. Ready? Let’s make some chocolatey magic!
Inspiration & Background: How Mocha Cheesecake Became My Go-To Treat
Let me tell you the story behind this Dreamy Mocha Cheesecake Magic. I actually stumbled across a mocha cheesecake at a tiny café while traveling in Seattle. The place was famous for its coffee, but their dessert menu was what really caught my eye. I tried a slice of their mocha cheesecake and, honestly, it was love at first bite. I spent the rest of the trip thinking about it and scribbling notes so I could recreate the flavors once I got home.
Mocha cheesecake is the perfect marriage of two classic favorites: chocolate and coffee. It’s got this sophisticated vibe, but it’s also super comforting. I started making this recipe for birthdays, holidays, and whenever I needed a “wow” factor. It’s especially great for winter gatherings, when everyone wants something cozy, but I’ve made it in summer too – just keep it chilled and it’s insanely refreshing.
What I love most is how versatile this dessert is. It can be dressed up for a fancy dinner or served casually with a cup of coffee. Plus, it’s awesome for Pinterest fans because it looks gorgeous and always gets those “how did you make this?” comments. Whether you’re a seasoned baker or just starting out, this cheesecake brings a little magic to any occasion. It’s become my go-to for impressing friends, and now it’s a staple in my recipe collection.
What Ingredients You’ll Need for Dreamy Mocha Cheesecake Magic
Let’s break down what goes into this mocha cheesecake. Each ingredient does its part to make this dessert something really special. I’ve learned a few tricks over the years, so I’ll share some personal notes along the way.
For the Crust:
- Chocolate cookie crumbs: You want about 1 ½ cups. I usually crush up chocolate graham crackers or Oreos (cream removed). The chocolatey base is key for that rich flavor.
- Melted butter: About ¼ cup. This holds everything together and gives the crust that perfect crunch.
- Sugar: Just 1 tablespoon. It helps balance the bitterness from the chocolate cookies.
For the Filling:
- Cream cheese: 24 ounces (three packages). Full-fat works best for that creamy, dreamy texture. If you use low-fat, it’ll be lighter but not as rich.
- Sour cream: 1 cup. I used to skip this, but trust me, you want that tang.
- Granulated sugar: 1 cup. Sweetens everything up perfectly.
- Eggs: 3 large eggs. They make the filling silky smooth.
- Semisweet chocolate chips: 1 cup, melted and cooled. This is where the magic happens – don’t skimp!
- Espresso powder: 2 tablespoons. This is what gives the “mocha” kick. If you can’t find espresso powder, instant coffee works (just bump it up to 3 tablespoons for flavor).
- Vanilla extract: 2 teaspoons. It rounds out the flavors.
- Salt: Just a pinch. It brings out the sweetness and makes everything pop.
For the Topping (Optional but amazing):
- Whipped cream: Homemade or store-bought. I like to pipe little swirls around the edge.
- Chocolate shavings: Just run a veggie peeler over a chocolate bar. It looks fancy but is super easy.
- Espresso beans: For a little crunch and decoration.
If you’re missing something, don’t stress! Swap cream cheese for Neufchâtel if you want it lighter, use Greek yogurt instead of sour cream, or mix in dark chocolate for a bolder taste. I usually grab ingredients from my local grocery store, but specialty shops have awesome espresso powders if you want to go all-out. Each ingredient plays its part, and together, they create this velvety, chocolatey, coffee-infused masterpiece that’s pretty much irresistible.
Equipment & Tools: What You Really Need (and Easy Alternatives)
- 9-inch springform pan: This is a must for easy release and a perfect round cheesecake. If you don’t have one, try a deep pie dish, but make sure to line it well.
- Electric mixer or stand mixer: Hand mixers work fine. Mixing by hand is possible, but your arm might hate you.
- Mixing bowls: At least two – one for crust, one for filling.
- Rubber spatula: For scraping down the sides and smoothing out the filling.
- Measuring cups and spoons: Accuracy helps, but a little “eyeballing” never hurt if you’re comfortable.
- Baking sheet: Place it under your pan to catch drips (trust me, you want this).
- Aluminum foil: For wrapping the pan in a water bath or just to protect the bottom.
If you don’t have a springform pan, just line your dish with parchment so you can lift the cheesecake out. I’ve done it in a regular cake pan in a pinch – it works, but be gentle!
How to Make Dreamy Mocha Cheesecake Magic
- Prep the pan: Butter the sides and bottom of your 9-inch springform pan. Line the bottom with parchment paper for easy removal.
- Make the crust: In a mixing bowl, combine 1 ½ cups chocolate cookie crumbs with ¼ cup melted butter and 1 tablespoon sugar. Mix until it looks like damp sand. Press evenly into the bottom of your pan and about ½ inch up the sides. Bake at 325°F for 8 minutes, then let cool.
- Mix the filling: Beat 24 oz cream cheese until fluffy (about 3 minutes). Add 1 cup sugar and blend until smooth. Toss in 1 cup sour cream, 2 teaspoons vanilla, and a pinch of salt. Mix again. Then, add the eggs one at a time, mixing just until blended after each.
- Add the mocha magic: Melt 1 cup semisweet chocolate chips in the microwave (start with 30 seconds, then stir and repeat until smooth). Let it cool slightly, then stir in 2 tablespoons espresso powder. Pour this chocolate-coffee mixture into your cream cheese batter. Mix until the color is even and gorgeous.
- Pour and smooth: Pour the filling over your cooled crust. Smooth the top with a spatula.
- Bake: Place the pan on a baking sheet. Bake at 325°F for 55-65 minutes. The edges should look set, but the center will jiggle a bit – that’s perfect! If you want zero cracks, bake it in a water bath (wrap the pan in foil and set it in a larger pan filled with hot water).
- Cool down: Turn off the oven and crack the door. Let your cheesecake sit inside for 1 hour. Then, transfer it to the counter for another hour. This slow cool keeps it from cracking.
- Chill: Refrigerate for at least 4 hours (overnight is best). Don’t rush this step – the flavors and texture get even better as it chills.
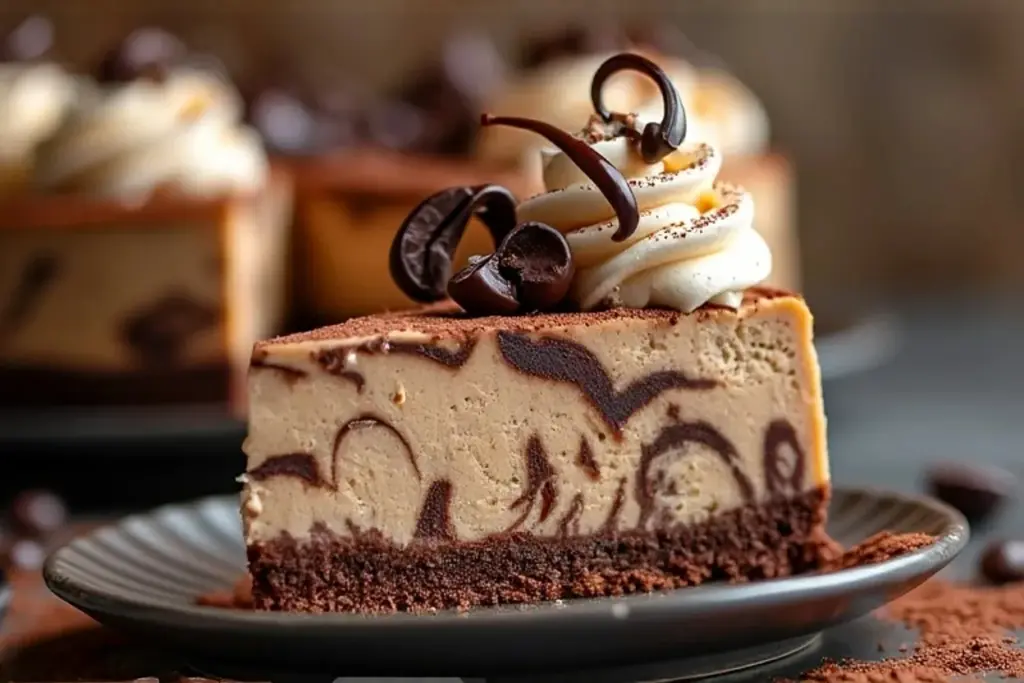
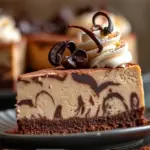
- Finish and decorate: Run a knife around the edge, then pop off the springform. Top with whipped cream, chocolate shavings, and espresso beans if you’re feeling extra.
If your cheesecake cracks, don’t panic! Cover it with whipped cream or drizzle with chocolate sauce. Honestly, a little imperfection just makes it look homemade (and that’s a good thing!). The hardest part is waiting for it to chill, but I promise it’s worth it.
Tips & Tricks for Perfect Mocha Cheesecake
- Room temp everything: Seriously, let your cream cheese, eggs, and sour cream sit out for an hour. Cold ingredients make lumpy batter.
- Don’t overmix the eggs: Once you add the eggs, mix just until combined. Overmixing is the #1 reason for cracks.
- Water bath magic: If you’re not afraid of a little extra work, bake your cheesecake in a water bath. It keeps the texture velvety and avoids dry edges.
- Chilling is key: I know it’s tough, but don’t skip the overnight chill. It makes the flavors blend and the texture set up just right.
- Crust fixes: If your crust feels too crumbly, add a little more butter. Too wet? Add more crumbs. It’s pretty forgiving.
- Topping tricks: Use a veggie peeler for chocolate shavings – it’s way easier than grating.
- Cover up cracks: If you get a crack (hey, it happens), just cover with toppings. No one will know!
- Freezing: You can freeze slices – just wrap tightly. Thaw in the fridge for a few hours before serving.
I’ve made every mistake in the book with cheesecake – rushing the chill, forgetting the water bath, underbaking the crust. But after a few tries, you figure out what works for you. My best advice? Don’t stress. Even a slightly imperfect mocha cheesecake still tastes AMAZING.
Variations & Customizations: Make It Your Own
One of the best things about Dreamy Mocha Cheesecake Magic is how easy it is to tweak. Want it extra chocolatey? Use dark chocolate chips for a bolder taste. Need it gluten-free? Swap out the crust for gluten-free cookies. Here are a few ideas:
- Less sweet: Cut down the sugar to ¾ cup for a more intense coffee flavor.
- Dairy-free: Use vegan cream cheese and coconut yogurt. It won’t be quite as rich, but it’s still delicious.
- Nutty twist: Add a handful of chopped toasted hazelnuts to the crust for a Nutella vibe.
- Mint mocha: Mix in a teaspoon of mint extract with the vanilla for a holiday spin.
- Alcohol kick: Add a splash of coffee liqueur (like Kahlúa) to the filling for that grown-up flavor.
- Personal favorite: Sometimes I swirl in a bit of caramel sauce before baking – it’s messy but so, so good.
Don’t be afraid to experiment. Cheesecake is pretty forgiving, and you might just invent your own signature flavor. If you try something wild and it works, let me know – I love new ideas!
Serving & Storage: Keep It Fresh and Fabulous
The best way to serve Dreamy Mocha Cheesecake Magic is straight from the fridge. Cold and creamy is definitely the way to go. Slice with a sharp knife (wipe it between cuts for clean edges) and serve on a pretty plate to show off those gorgeous layers.
If you have leftovers, cover the cheesecake tightly with foil or plastic wrap and keep it in the fridge. It’ll stay fresh for about 5 days. For longer storage, wrap individual slices and freeze. Thaw overnight in the fridge – it’ll taste just as dreamy as the first day.
If you want to make this ahead for a party, bake and chill as usual, then add toppings right before serving. If you’re reheating a slice (for some reason!), use short bursts in the microwave – just don’t overdo it or the texture gets weird. But honestly, cold is best!
Health Benefits: A Little Indulgence, A Lot of Happiness
Let’s be real – mocha cheesecake isn’t exactly a health food, but it does have a few perks. The chocolate is packed with antioxidants, and coffee gives a gentle energy boost. Plus, using full-fat dairy means you’re getting some calcium and protein.
If you’re watching your sugar or dairy, you can totally adapt this recipe with lower-sugar substitutes or swap in dairy-free options. And hey, a little treat now and then is good for the soul! It’s about balance, right?
FAQs: Your Mocha Cheesecake Questions Answered
Can I make Dreamy Mocha Cheesecake Magic ahead of time?
Absolutely! It actually tastes better after chilling overnight. Make it a day or two before your event for stress-free serving.
What if my cheesecake cracks?
No worries – just cover it with whipped cream or chocolate shavings. It’ll still taste amazing, promise!
Do I need a water bath?
It helps prevent cracks and keeps the texture super creamy, but you can skip it if you’re in a hurry. Just keep an eye on the baking time!
Can I freeze mocha cheesecake?
Yep! Wrap slices tightly in plastic, freeze, and thaw in the fridge before serving. It tastes just as good.
Is espresso powder necessary?
It gives the coffee kick, but you can use instant coffee or even strong brewed coffee (just reduce the sour cream a bit to balance liquid).
So there you have it – Dreamy Mocha Cheesecake Magic: the homemade dessert that’s as easy as it is indulgent. If you’re a chocolate lover, coffee fan, or just someone who wants to make something special, give this recipe a try. You’ll be hooked!
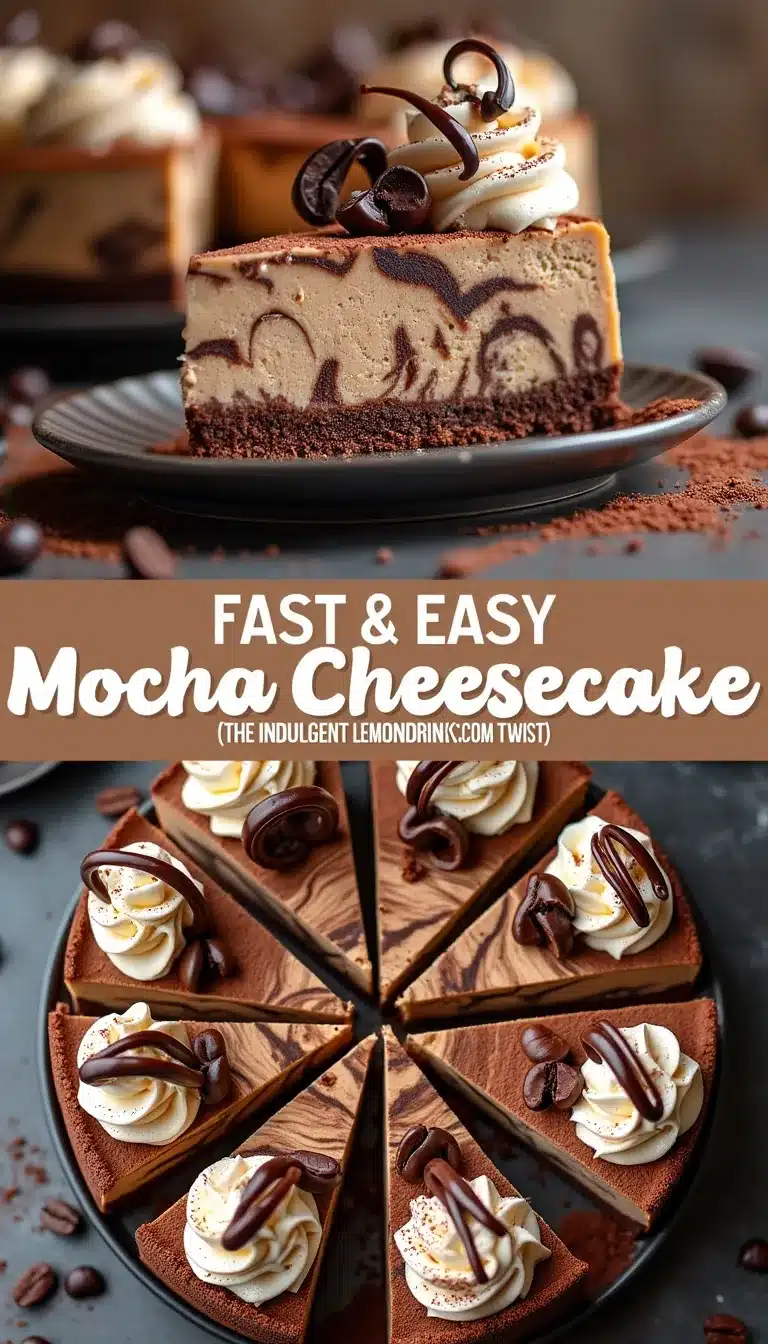
Dreamy Mocha Cheesecake Magic
This decadent mocha cheesecake combines rich chocolate, creamy cheesecake, and a subtle coffee kick for a show-stopping dessert that’s surprisingly easy to make. Perfect for celebrations or whenever you need a chocolatey pick-me-up.
- Prep Time: 25 minutes
- Total Time: 5 hours 30 minutes
- Yield: 12 servings 1x
- Category: Dessert
Ingredients
- 1 1/2 cups chocolate cookie crumbs (such as chocolate graham crackers or Oreos, cream removed)
- 1/4 cup melted butter
- 1 tablespoon sugar
- 24 ounces cream cheese (three 8-ounce packages, full-fat recommended)
- 1 cup sour cream
- 1 cup granulated sugar
- 3 large eggs
- 1 cup semisweet chocolate chips, melted and cooled
- 2 tablespoons espresso powder (or 3 tablespoons instant coffee)
- 2 teaspoons vanilla extract
- Pinch of salt
- Whipped cream (for topping, optional)
- Chocolate shavings (for topping, optional)
- Espresso beans (for topping, optional)
Instructions
- Butter the sides and bottom of a 9-inch springform pan. Line the bottom with parchment paper.
- In a mixing bowl, combine chocolate cookie crumbs, melted butter, and sugar. Mix until it resembles damp sand.
- Press the mixture evenly into the bottom and about 1/2 inch up the sides of the pan. Bake at 325°F for 8 minutes, then let cool.
- Beat cream cheese until fluffy (about 3 minutes). Add granulated sugar and blend until smooth.
- Add sour cream, vanilla extract, and a pinch of salt. Mix again.
- Add eggs one at a time, mixing just until blended after each addition.
- Melt chocolate chips in the microwave (30-second intervals, stirring between). Let cool slightly, then stir in espresso powder.
- Pour the chocolate-coffee mixture into the cream cheese batter. Mix until evenly combined.
- Pour the filling over the cooled crust and smooth the top with a spatula.
- Place the pan on a baking sheet. Bake at 325°F for 55-65 minutes, until edges are set but the center jiggles slightly. For best results, bake in a water bath (wrap pan in foil and set in a larger pan with hot water).
- Turn off the oven and crack the door. Let the cheesecake sit inside for 1 hour. Then transfer to the counter for another hour.
- Refrigerate for at least 4 hours, preferably overnight.
- Run a knife around the edge, remove the springform, and top with whipped cream, chocolate shavings, and espresso beans if desired.
Notes
For best results, use room temperature ingredients to avoid lumps. Don’t overmix after adding eggs to prevent cracks. A water bath helps achieve a creamy texture and prevents cracking. Chill overnight for optimal flavor and texture. If cracks appear, cover with whipped cream or chocolate shavings. Cheesecake can be frozen in slices for up to 2 months.
Nutrition
- Serving Size: 1 slice (1/12 of cheesecake)
- Calories: 480
- Sugar: 30
- Sodium: 320
- Fat: 33
- Saturated Fat: 19
- Carbohydrates: 41
- Fiber: 2
- Protein: 7
Keywords: mocha cheesecake, chocolate cheesecake, coffee dessert, easy cheesecake, homemade cheesecake, espresso cheesecake, chocolate coffee dessert, holiday dessert, party dessert, creamy cheesecake