Let me just say, there’s something downright magical about the combo of strawberries, sweet cream, and buttery cake. I still remember the first time I tried making these Strawberry Shortcake Milkshake Jars. It was one of those lazy Sundays when you just crave something fun, a little bit nostalgic, and totally Instagram (or, let’s be real, Pinterest) worthy. I was rummaging through my fridge and found a handful of fresh strawberries and, honestly, the rest is delicious history!
This milkshake isn’t just a drink—it’s a whole mood. It’s the kind of thing that makes you want to throw on a cute apron, blast some oldies, and pretend you’re in a retro diner. What I love most? You don’t need any fancy skills or gadgets. If you can blend and layer, you’re golden. Plus, serving them in jars? Super cute and totally gives those vintage soda shop vibes.
So, whether you’re planning a backyard picnic, a girls’ night, or just want to treat yourself after a long week, these Strawberry Shortcake Milkshake Jars are honestly a must. Let me walk you through everything you need to know to make these at home. Trust me, your taste buds (and your Pinterest followers) will thank you!
What’s the Story Behind Strawberry Shortcake Milkshake Jars?
Okay, so why strawberry shortcake in milkshake form—and why jars? That’s a fair question! For me, this recipe is a mashup of two things I absolutely love: those classic strawberry shortcake desserts my grandma used to make, and the over-the-top milkshakes you see at old-school diners.
Strawberry shortcake itself has been around forever. It’s one of those American desserts that just never goes out of style. Every bite takes me back—think summer fairs, picnics, and family gatherings. So, when I wanted to put a fun twist on it, I thought, why not combine it with a creamy milkshake?
The jar part came later, honestly out of necessity. I ran out of glassware one day and had a bunch of mason jars in the pantry. Turns out, jars are perfect for layering all the good stuff—plus, they just look adorable. The whole thing feels like a cross between a drink and a dessert, making it perfect for parties or even a cozy solo treat.
I love making these Strawberry Shortcake Milkshake Jars in early summer when strawberries are super sweet and juicy, but honestly, they’re fantastic any time you can get your hands on decent berries. They’re a hit with kids and adults alike, and they’re perfect for birthdays, Mother’s Day brunches, or just a random Tuesday. Basically, any excuse will do!
What Ingredients Make Strawberry Shortcake Milkshake Jars So Special?
Let’s get into what you’ll need. The magic here is all about combining simple, classic ingredients in a way that just works.
- Fresh Strawberries: The star of the show! Look for ripe, bright red berries for the best flavor. If you’re in a pinch, frozen strawberries totally work—just thaw them first.
- Vanilla Ice Cream: Creamy, dreamy, and the base of our milkshake. I usually go for a good-quality vanilla, but honestly, whatever you have on hand will be delicious.
- Whole Milk: This helps the shake blend up smooth and adds that old-fashioned creaminess. You can use 2% or even a plant-based milk if you want. Almond milk gives a nice nutty note!
- Pound Cake or Shortcake Biscuits: Here’s where you get that real shortcake vibe! You can bake your own, but store-bought pound cake saves time and is just as tasty. I’ve even used leftover angel food cake… not traditional, but still so good.
- Whipped Cream: For that classic topping. Homemade or store-bought—no judgment here. I tend to whip up my own with a splash of vanilla extract for extra flavor.
- Strawberry Sauce or Jam (optional): If you want to drizzle a little extra berry goodness between the layers, a quick strawberry sauce or even a spoonful of jam adds a sweet, tangy punch.
- Sprinkles or Crushed Cookies (optional): Not necessary, but if you’re feeling playful, these add a cute finish and extra crunch.
One thing I’ve learned: don’t stress if you’re missing something. I’ve swapped out the cake for vanilla wafers, used different types of milk, and even thrown in a handful of blueberries for a twist. The beauty of this recipe is that it’s super forgiving. Just use what you’ve got and make it your own!
What Equipment and Tools Do You Need?
You really don’t need much for these Strawberry Shortcake Milkshake Jars. Here’s what I always grab:
- Blender: Any blender will work. If yours is old (like mine), just blend a little longer to get it extra smooth.
- Mason Jars or Glasses: Jars work best for layering, but honestly, use mugs, cups, or whatever you have.
- Spoon: For layering the cake and strawberries.
- Straw: Optional, but it makes sipping more fun!
- Knife and Cutting Board: For slicing strawberries and cake.
If you don’t have a blender, a food processor or even an immersion blender in a big bowl will do the trick. I’ve even mashed everything by hand in a pinch—chunky, but still delish!
How Do You Make Strawberry Shortcake Milkshake Jars?
Okay, now for the fun part! Here’s how I whip these up at home. It’s honestly so easy, and layering them in jars just makes it feel extra special.
- Prep the Strawberries: Wash and hull about 1 cup of fresh strawberries. Slice half for layering and keep the rest for blending. If you like them sweet, toss the slices with a spoonful of sugar and let them sit for 10 minutes. Makes them juicier!
- Make the Milkshake: In your blender, add 2 cups vanilla ice cream, 1/2 cup milk, and the unsliced strawberries. Blend until smooth and creamy. If you want it thicker, add more ice cream. If it’s too thick to pour, splash in a bit more milk.
- Cube the Cake: Cut your pound cake or shortcake into bite-sized cubes. You’ll want about 1 cup total.
- Layer it Up: Grab your jars and start layering! Here’s my usual order:
- A handful of cake cubes on the bottom
- A layer of strawberry slices
- Drizzle of strawberry sauce or jam (if using)
- Pour in some milkshake
- Repeat the layers if your jar is tall enough
- Finish with a big swirl of whipped cream
- Top and Decorate: Add extra strawberry slices, a sprinkle of crushed cookies, or a few colorful sprinkles. Pop in a straw and you’re ready to go!
Little things I’ve learned: If you want those picture-perfect layers, use a spoon to gently layer each ingredient. For an even colder treat, chill your jars in the freezer for 10 minutes before assembling. And if you make a mess? No worries! That’s what makes homemade treats charming, right?
If your milkshake turns out too runny, just add an extra scoop of ice cream and blend again. If it’s too thick, a splash of milk does the trick. This recipe easily makes 2–3 jars, but you can double it for a crowd.
Tips & Tricks for Perfect Strawberry Shortcake Milkshake Jars
Over the years, I’ve picked up a few handy tips that make these milkshake jars extra awesome:
- Use Cold Ingredients: Everything blends better and stays thick if your milk and ice cream are really cold.
- Sweeten Strawberries: Even if your berries aren’t super ripe, a quick toss with sugar brings out their flavor.
- Layer Carefully: Spoon the milkshake in slowly so you don’t squish the cake and berries.
- Don’t Overblend: Blend just until smooth, or you’ll lose that thick, creamy texture.
- Customize Your Whipped Cream: Whip in a little vanilla or even a splash of almond extract for a twist.
I’ve definitely made the mistake of layering everything too fast and ending up with a mushy mess. It still tasted amazing, but for those pretty Pinterest shots, take your time. If you’re making these ahead, keep the milkshake in the fridge and assemble right before serving so the cake stays fluffy.
And, honestly, don’t stress about perfection. Half the fun is in making it your own. If you want more crunch, add some granola or crushed cookies. Feeling extra? Top with a cherry!
How Can You Customize Strawberry Shortcake Milkshake Jars?
This is where you can really have fun! Here are some of my favorite ways to make this recipe your own:
- Berry Swap: Try raspberries, blueberries, or blackberries instead of (or in addition to) strawberries.
- Dairy-Free Version: Use coconut or almond milk ice cream and your favorite plant-based milk.
- Gluten-Free: Use gluten-free pound cake or shortbread cookies. There are so many good options out there now!
- Chocolate Lovers: Add mini chocolate chips to the layers, or swirl in some chocolate sauce.
- Extra Boozy: For an adults-only version, add a splash of strawberry liqueur or vanilla vodka to the milkshake. So good for a summer party!
My personal favorite twist? Swapping in lemon pound cake and adding a hint of lemon zest to the whipped cream. It’s bright, tangy, and balances the sweetness perfectly. Experiment and let your taste buds be the guide!
How Should You Serve and Store These Milkshake Jars?
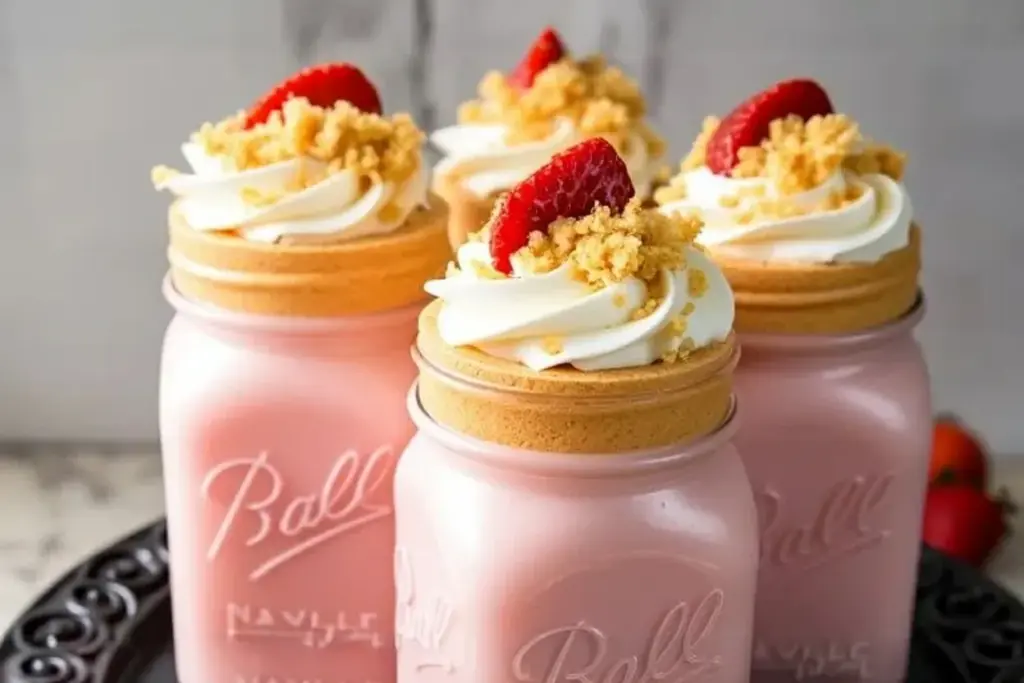
These Strawberry Shortcake Milkshake Jars are best served right after making them, when everything is cold and the layers are fresh. I love using mason jars for that retro look, but honestly, any clear glass will do—it shows off the pretty layers!
Serve them with a fat straw and a long spoon so you can get every last bit of cake and berry goodness. If you’re making a bunch for a party, you can blend the milkshake base and prep the cake and berries ahead, then assemble just before serving.
If you have leftovers (which, let’s be honest, is rare), cover the jars and keep them in the fridge for up to a day. The cake will soften, but it’s still tasty. For a hot weather treat, you can even pop them in the freezer for a short time for a thicker, almost ice cream-like texture.
Are Strawberry Shortcake Milkshake Jars Good for You?
Okay, so these milkshake jars are definitely a treat, but there are some good-for-you perks! Strawberries are packed with vitamin C and antioxidants, and if you use a lighter or plant-based ice cream, you can cut down on the dairy and sugar. You can also skip the extra sugar or sauce if your berries are sweet enough.
They’re easy to make gluten-free or dairy-free depending on your needs, and you can control the sweetness by adjusting the amount of ice cream and cake. So, while it’s definitely a dessert, you can feel good knowing there’s a little fruit power in every jar!
FAQs About Strawberry Shortcake Milkshake Jars
Can I make these ahead of time?
You can prep the ingredients ahead (blend the milkshake, slice the berries, cube the cake), but it’s best to assemble them right before serving so the cake doesn’t get soggy.
What if I don’t have mason jars?
No worries! Any clear glass or even a cute cup will work. The layers might look a little different, but they’ll taste just as good.
Can I use frozen strawberries?
Absolutely! Just thaw them first and drain off any extra juice so your shake doesn’t get watery.
How do I make them dairy-free?
Use your favorite non-dairy ice cream and milk. Coconut or almond milk works great, and there are tons of awesome plant-based whipped creams out there now.
Is there a healthier way to make these?
For a lighter version, use reduced-sugar ice cream, skip the whipped cream, or add extra berries for more natural sweetness. You can also use angel food cake for fewer calories!
Strawberry Shortcake Milkshake Jars are seriously one of those recipes you’ll come back to again and again. They’re fun, easy, and just plain happy-making. If you give them a try, let me know how it goes—and don’t forget to snap a pic for Pinterest. Happy sipping!
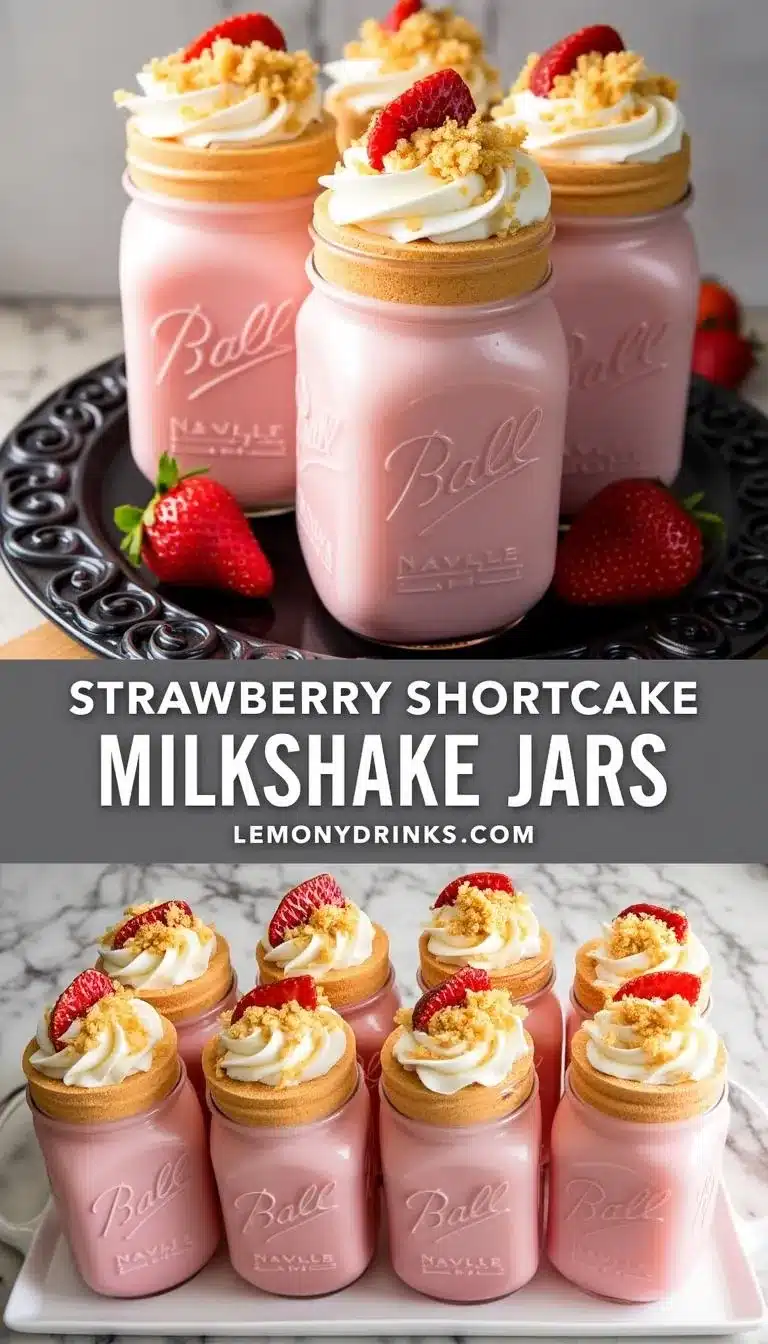
Strawberry Shortcake Milkshake Jars

Strawberry Shortcake Milkshake Jars are a fun, vintage-inspired dessert drink that combines creamy vanilla milkshake, fresh strawberries, buttery cake, and whipped cream, all layered in mason jars for a nostalgic treat. Perfect for parties, picnics, or a cozy solo indulgence, these jars are easy to customize and guaranteed to impress.
- Prep Time: 10 minutes
- Total Time: 10 minutes
- Yield: 2-3 servings 1x
- Category: Milkshake
Ingredients
- 1 cup fresh strawberries, hulled and divided
- 2 cups vanilla ice cream
- 1/2 cup whole milk (or plant-based milk)
- 1 cup pound cake or shortcake biscuits, cut into cubes
- Whipped cream (homemade or store-bought)
- Strawberry sauce or jam (optional, for drizzling)
- Sprinkles or crushed cookies (optional, for topping)
- 1 tablespoon sugar (optional, for sweetening strawberries)
Instructions
- Wash and hull the strawberries. Slice half for layering and keep the rest for blending. If desired, toss the slices with 1 tablespoon sugar and let sit for 10 minutes.
- In a blender, combine the unsliced strawberries, vanilla ice cream, and milk. Blend until smooth and creamy. Adjust thickness by adding more ice cream or milk as needed.
- Cut pound cake or shortcake biscuits into bite-sized cubes.
- Layer in mason jars: start with cake cubes, then strawberry slices, a drizzle of strawberry sauce or jam (if using), and pour in some milkshake. Repeat layers if jars are tall enough.
- Top with a swirl of whipped cream, extra strawberry slices, sprinkles, or crushed cookies as desired.
- Serve immediately with a straw and spoon.
Notes
For best results, use cold ingredients and assemble just before serving to keep the cake fluffy. You can swap in plant-based milk and ice cream for a dairy-free version, or use gluten-free cake for gluten-free needs. Chill jars in the freezer for 10 minutes before layering for an extra cold treat.
Nutrition
- Serving Size: 1 jar (about 12-16 oz)
- Calories: 420
- Sugar: 44
- Sodium: 210
- Fat: 18
- Saturated Fat: 11
- Carbohydrates: 60
- Fiber: 2
- Protein: 6
Keywords: strawberry shortcake milkshake, vintage dessert drink, mason jar milkshake, summer milkshake, strawberry dessert, easy milkshake recipe, party drinks, retro milkshake, layered milkshake, picnic dessert