The punch bowl was empty before the ice even melted. My cousin texted me the next morning—not to say thanks for hosting, but to ask for the recipe. That’s how it always goes with this one. I didn’t set out to create anything special. I just needed something quick for a backyard barbecue, and the grocery store had rainbow sherbet on sale. Three ingredients and ten minutes later, I had a drink that stole the whole show. People kept circling back to the table, cups in hand, looking confused when they realized there was nothing left to scoop. Honestly, I was a little surprised myself. It’s just punch, right? But there’s something about that creamy, fizzy, citrusy combination that hits different. I’ve made it for every party since, and it never fails. This rainbow sherbet punch is the kind of recipe you don’t plan—it just becomes the thing everyone remembers.
Why You’ll Love This Recipe
After testing this punch at more gatherings than I can count, I can tell you exactly why it works. It’s not complicated. It’s not fancy. But it delivers every single time.
- Quick & Easy: You can throw this together in under five minutes. No blending, no muddling, no fuss. Just scoop, pour, and stir.
- Simple Ingredients: You only need three things—sherbet, soda, and juice. No exotic syrups or hard-to-find mixers.
- Perfect for Parties: Birthdays, baby showers, Fourth of July, game day—this punch fits any occasion. It’s especially great for large crowds because it scales up effortlessly.
- Crowd-Pleaser: Kids love the sweet, creamy taste. Adults love how refreshing it is. I’ve seen people go back for thirds without hesitation.
- Unbelievably Delicious: The texture is what gets you. The sherbet melts slowly into the soda, creating this dreamy, frothy layer on top. It’s like a float and a punch had a baby.
What makes this different from other party punches? Most of them are either too sweet, too tart, or too flat after an hour. This one stays bubbly because the sherbet keeps releasing carbonation as it melts. Plus, the rainbow colors make it look festive without any extra effort. No fancy garnishes needed. No complicated layering. It just looks good naturally.
This is the kind of drink that makes you close your eyes after the first sip. It’s nostalgic without being childish. It’s simple without being boring. And honestly? It’s the easiest way to look like you tried harder than you actually did.
What Ingredients You Will Need
This recipe uses three basic ingredients, but each one plays a specific role. Here’s what you need and why it matters.
- Rainbow sherbet (1.5 quarts or about 6 cups): This is the star of the show. Rainbow sherbet is lighter than ice cream but creamier than sorbet, so it melts into the punch without making it too thick. It also gives you those beautiful pastel colors. I prefer the store-brand version from most grocery chains—it’s affordable and works perfectly. If you want a more pronounced citrus flavor, look for a brand that uses real fruit juice.
- Lemon-lime soda (2 liters, chilled): Sprite, 7UP, or any clear citrus soda works great. The bubbles add fizz, and the lemon-lime flavor complements the sherbet without overpowering it. Make sure it’s well-chilled before you start. Warm soda will melt the sherbet too fast and leave you with a flat, soupy mess.
- Pineapple juice (2 cups, chilled): This is my secret weapon. Pineapple juice adds a subtle tropical sweetness that ties all the citrus flavors together. It also keeps the punch from being too sharp. If you don’t have pineapple juice, you can substitute with orange juice, but the flavor will be a little more straightforward.
Optional add-ins:
- Fresh fruit slices (oranges, lemons, limes, or strawberries) for garnish
- A splash of grenadine for extra color and sweetness
- Mint sprigs for a fresh aroma
For the adult version:
- 1 cup of vodka, white rum, or prosecco. I’ve tried all three, and prosecco gives it a lovely bubbly upgrade. Vodka keeps it neutral, while rum adds a slight warmth.
Ingredient tips: If you’re making this ahead of time, keep the sherbet in the freezer until the last possible moment. You want it rock-solid so it melts slowly in the punch bowl. Also, don’t skip chilling the soda and juice. Cold ingredients are non-negotiable here. Room-temperature ingredients will turn your punch into a sad, watery puddle before your guests even arrive.
Equipment Needed
You don’t need much for this recipe, which is part of its charm. Here’s what I use:
- Large punch bowl (at least 3-4 quarts): Glass or plastic works fine. I have a vintage glass punch bowl I found at a thrift store, and it’s perfect for this. If you don’t have a punch bowl, a large pitcher or even a clean plastic storage container works in a pinch.
- Ice cream scoop or large spoon: For scooping the sherbet. A regular spoon works, but a scoop makes it easier to get those nice round scoops.
- Large ladle: For serving. A glass or plastic ladle is ideal, but a metal one works too.
- Punch cups or small glasses: I use 6-ounce cups so people can go back for refills without wasting any.
- Measuring cups: For the pineapple juice. Eyeballing it works, but measuring ensures consistent flavor.
Budget-friendly alternatives: If you don’t own a punch bowl, a large glass mixing bowl works perfectly. I’ve also used a clean plastic beverage dispenser with a spigot—it’s actually easier for self-serve parties because guests can fill their own cups without waiting for a ladle.
Preparation Method
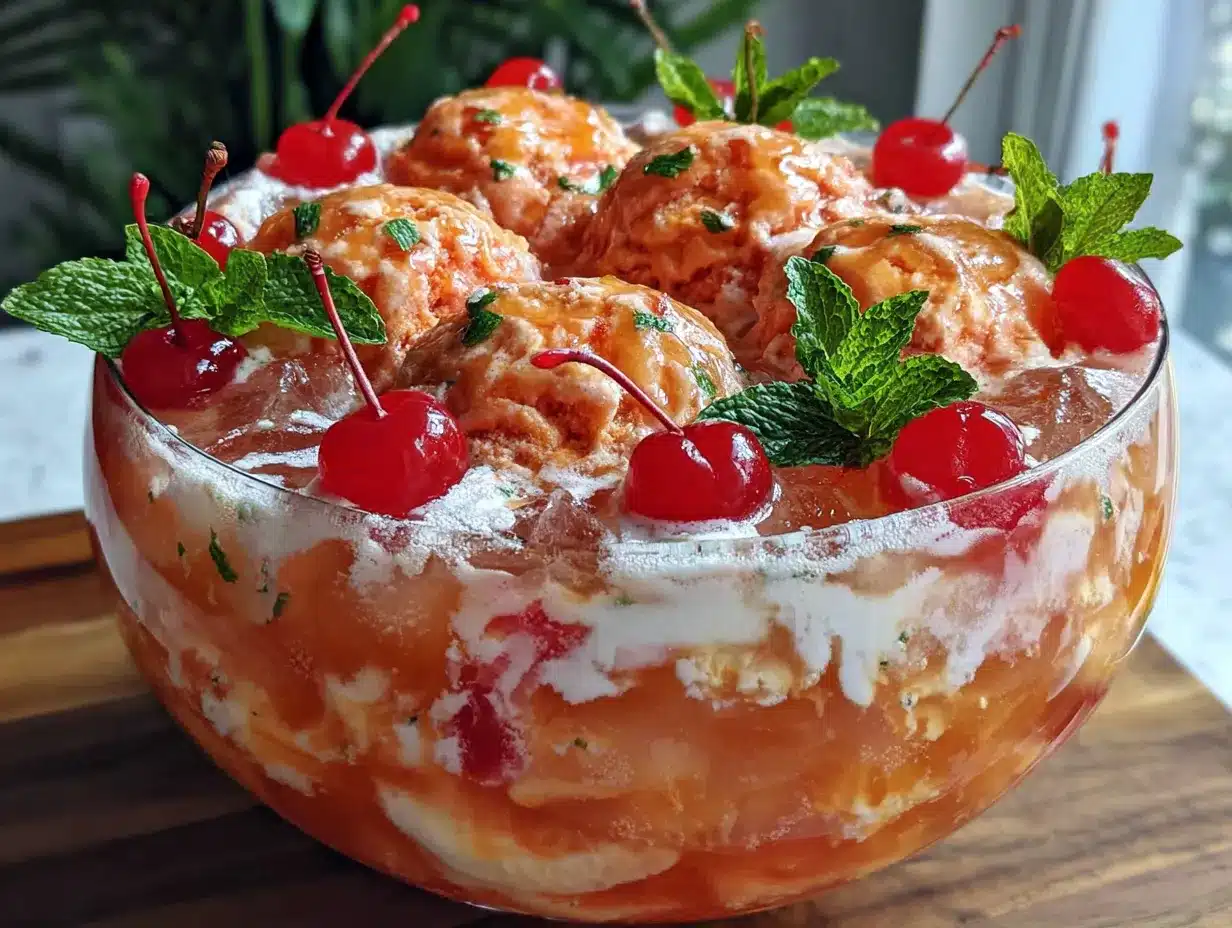
This is almost too easy, but I’ll walk you through it step by step so you get perfect results every time.
- Chill everything first. Put the soda and pineapple juice in the refrigerator at least 4 hours before you plan to serve. Keep the sherbet in the freezer until you’re ready to assemble. Cold ingredients are the difference between a punch that stays bubbly for hours and one that goes flat in twenty minutes.
- Set up your punch bowl. Place the punch bowl on your serving table. If you’re worried about condensation, put a cloth napkin or small towel underneath to catch drips. I learned this the hard way after a pool party incident involving a wet tablecloth and a dropped phone.
- Pour the pineapple juice. Measure 2 cups of chilled pineapple juice and pour it into the punch bowl. If you’re making the adult version, add your alcohol now too. Give it a quick stir to combine.
- Add the lemon-lime soda. Slowly pour the entire 2-liter bottle of chilled soda into the bowl. Pour gently to preserve as much carbonation as possible. You’ll see lots of bubbles rise to the surface—that’s a good sign.
- Scoop the sherbet. Open the sherbet container and use your ice cream scoop to make large scoops. Aim for about 6-8 scoops, depending on size. Drop them gently into the punch bowl. Don’t stir yet—let the sherbet float on top for a minute.
- Let it rest for 2-3 minutes. This is the hardest part, I know. But giving the sherbet a moment to start melting creates that beautiful creamy layer on top. If you stir immediately, the sherbet will break apart too fast and you’ll lose the visual effect.
- Stir gently once or twice. Use your ladle to give the punch a couple of slow, gentle stirs. You want to incorporate the melting sherbet into the liquid without breaking up all the scoops. The goal is a frothy, slightly creamy texture with visible chunks of sherbet floating around.
- Garnish if desired. Float some fresh fruit slices on top or add a sprig of mint. I like to add orange and lemon slices because they match the rainbow colors and look pretty against the pink and orange sherbet.
- Serve immediately. Ladle the punch into cups, making sure each serving gets some of the melting sherbet. The texture changes as the sherbet continues to melt, so the first cups will be thicker and creamier than the last few. That’s part of the fun.
Pro tip: If you’re serving this at a party that lasts more than an hour, keep the remaining sherbet in the freezer. When the punch bowl starts looking low or the fizz fades, add a few fresh scoops. This revives the bubbles and keeps the flavor bright.
Cooking Tips & Techniques
I’ve made this punch probably twenty times now, and I’ve learned a few things the hard way. Here are my best tips:
Don’t over-stir. I know it’s tempting to mix everything into a uniform pink liquid, but resist the urge. The beauty of this punch is the contrast between the creamy sherbet and the fizzy soda. Over-stirring turns it into a flat, homogeneous mess. Just a couple of gentle stirs is plenty.
Keep the sherbet frozen until the last minute. If you let it sit out while you’re setting up, it’ll soften too much and melt into the soda before anyone gets a cup. I keep my sherbet in the freezer and only scoop it right before I’m ready to serve. If I’m making this for a big party, I sometimes scoop the sherbet into a separate bowl and put it back in the freezer until showtime.
Watch your ratios. The 1.5 quarts of sherbet to 2 liters of soda to 2 cups of juice ratio is my sweet spot. Too much sherbet and the punch becomes thick and milky. Too much soda and it’s just flavored carbonated water with no body. Trust the proportions.
Temperature matters more than you think. I once made this for a summer picnic and forgot to chill the soda. The punch was lukewarm within ten minutes, and the sherbet melted into a sad puddle. Now I put everything in the fridge the night before and even chill the punch bowl if I remember. Cold ingredients keep the sherbet from dissolving too fast and maintain that perfect fizzy texture.
One mistake I’ll never make again: Using diet soda. I tried it once thinking it would save calories, but the artificial sweetener made the punch taste weirdly metallic. Stick with regular lemon-lime soda. You’re already serving punch—nobody’s counting calories here.
Variations & Adaptations
This recipe is flexible, and I’ve tried several variations over the years. Here are my favorites:
1. Tropical Rainbow Punch: Swap the pineapple juice for mango nectar and add a splash of coconut cream. The coconut flavor pairs beautifully with the citrus sherbet and makes it feel extra tropical. I made this version for a luau-themed party and it was gone in thirty minutes.
2. Berry Rainbow Punch: Use raspberry lemonade instead of pineapple juice and add a handful of fresh raspberries and blueberries to the punch bowl. The berries sink to the bottom and create a pretty layered effect. This version is slightly tarter than the original, which I actually prefer.
3. Creamsicle Punch: Use orange sherbet instead of rainbow and add a splash of vanilla extract. This tastes exactly like a creamsicle float. I made this for a neighborhood block party and had three people ask for the recipe before I even put the ladle down.
4. Dairy-Free Version: Look for a dairy-free coconut or fruit sorbet instead of sherbet. Coconut sorbet works especially well because it has a similar creamy texture. The flavor will be different, but it’s still delicious and refreshing.
5. Sparkling Wine Punch: Replace the lemon-lime soda with a bottle of prosecco or champagne. This makes it more elegant and perfect for brunches or celebrations. I served this at a baby shower and it was a hit. Just be aware that the alcohol content is higher, so go easy on the pour.
6. Non-Alcoholic Party Version: Skip the alcohol entirely—this punch is already amazing on its own. I’ve served it at kids’ birthday parties and adult gatherings with equal success. Nobody misses the booze when the flavor is this good.
Serving & Storage Suggestions
Serving temperature: Serve this punch immediately after assembling. It’s best when the sherbet is still partially frozen and the soda is ice-cold. If your party is outside on a hot day, place the punch bowl in a larger bowl filled with ice to keep everything cold.
Presentation tips: I like to use a clear glass punch bowl so the rainbow colors show through. Add a few floating fruit slices for color—orange wheels, lemon rounds, and lime slices look beautiful against the pink and orange sherbet. If you’re feeling fancy, freeze some edible flowers in ice cubes and float them on top.
Complementary dishes: This punch pairs well with light appetizers like fruit skewers, cheese platters, or mini sandwiches. It’s also great alongside a strawberry basil mimosa for a brunch spread. For a full party menu, I like to serve it with finger foods that don’t compete with the sweet, citrusy flavor.
Storage: This punch doesn’t store well, honestly. The sherbet melts and the soda goes flat within an hour or two. If you have leftovers, you can pour the liquid into a pitcher and refrigerate it, but it won’t taste the same. I usually just accept that this is a make-and-serve recipe and plan my quantities accordingly.
Reheating: Don’t. Just don’t. This is a cold drink through and through.
Flavor development: Unlike some punches that get better as they sit, this one peaks in the first thirty minutes. The sherbet gradually melts and changes the texture from fizzy and creamy to more uniform and milky. Both versions are good, but the early servings are definitely the best.
Nutritional Information & Benefits
Let’s be real—this is a party punch, not a health drink. But here’s the approximate nutritional breakdown per 6-ounce serving (without alcohol):
- Calories: 180-220
- Carbohydrates: 35-40g
- Sugar: 30-35g
- Fat: 2-3g
- Protein: 1g
Health considerations: Rainbow sherbet is lower in fat than ice cream, so this punch is a bit lighter than traditional creamy punches. The pineapple juice provides a small amount of vitamin C, and the citrus flavors come from real fruit juice in the sherbet.
Dietary notes: This recipe contains dairy (sherbet typically has milk or cream) and sugar. It’s not suitable for vegan, keto, or low-sugar diets unless you make substitutions. For a lower-sugar version, try using a sugar-free sherbet and diet soda, though I’ll warn you—the texture and flavor won’t be quite the same.
Allergens: Sherbet contains milk, so this is not dairy-free. It’s also not gluten-free in some cases (check your sherbet brand for additives), though most are fine. If you have guests with allergies, I recommend using a dairy-free sorbet and checking labels carefully.
My personal take: I don’t make this punch for its nutritional value. I make it because it brings people together, makes them smile, and reminds them of childhood birthday parties. Sometimes that’s more important than counting calories.
Frequently Asked Questions
Can I make this punch ahead of time?
Not really. This punch is best served immediately after assembling. The sherbet melts and the soda goes flat within an hour. If you want to prep ahead, chill all the ingredients and keep the sherbet in the freezer until you’re ready to serve. Then just assemble right before your guests arrive.
Can I use a different flavor of sherbet?
Absolutely. Rainbow sherbet is classic, but you can use any flavor you like. Orange sherbet gives you a creamsicle vibe. Lime sherbet is tart and refreshing. Raspberry sherbet adds a pretty pink color. I’ve even used mango sherbet for a tropical twist. Just keep the total amount the same—about 1.5 quarts.
How do I make this punch for a large crowd?
This recipe serves about 12-15 people with 6-ounce cups. For larger crowds, simply double or triple the ingredients. Use a bigger punch bowl or set up multiple serving stations. Just remember to keep the extra sherbet in the freezer and add fresh scoops as the punch bowl runs low.
Can I add alcohol to this punch?
Yes! Vodka, white rum, or prosecco all work well. Add 1 cup of alcohol to the punch bowl before adding the soda and sherbet. I personally prefer prosecco because it adds extra bubbles and a touch of elegance. If you’re serving a crowd, you can also set up a self-serve bar with small bottles of alcohol so guests can spike their own cups.
Why did my punch turn out watery?
This usually happens when the ingredients aren’t cold enough. If your soda and juice are room temperature, the sherbet will melt too fast and turn the punch into a watery mess. Always chill everything overnight or for at least 4 hours before assembling. Also, don’t stir too much—gentle stirring keeps the sherbet from breaking apart too quickly.
Conclusion
This easy rainbow sherbet party punch is the kind of recipe that makes you look like a hero with almost zero effort. It’s bright, bubbly, and absolutely irresistible. I’ve made it for backyard barbecues, baby showers, birthday parties, and casual get-togethers, and it never fails to get compliments. The best part? You probably already have everything you need in your kitchen right now.
I love this recipe because it brings back memories of childhood parties while still feeling fresh and fun for adults. It’s nostalgic without being childish. It’s simple without being boring. And honestly, it’s just really, really good.
If you make this punch, I’d love to hear about it. Leave a comment below and let me know how it turned out. Did you add alcohol? Try a different sherbet flavor? Serve it at a specific occasion? I read every comment and I love seeing your variations. And if you’re looking for more party drink ideas, check out this refreshing sparkling berry punch or this strawberry lemonade vodka punch for another crowd-pleasing option.
Now go make some punch and enjoy the party. You’ve got this.
Pin This Recipe!
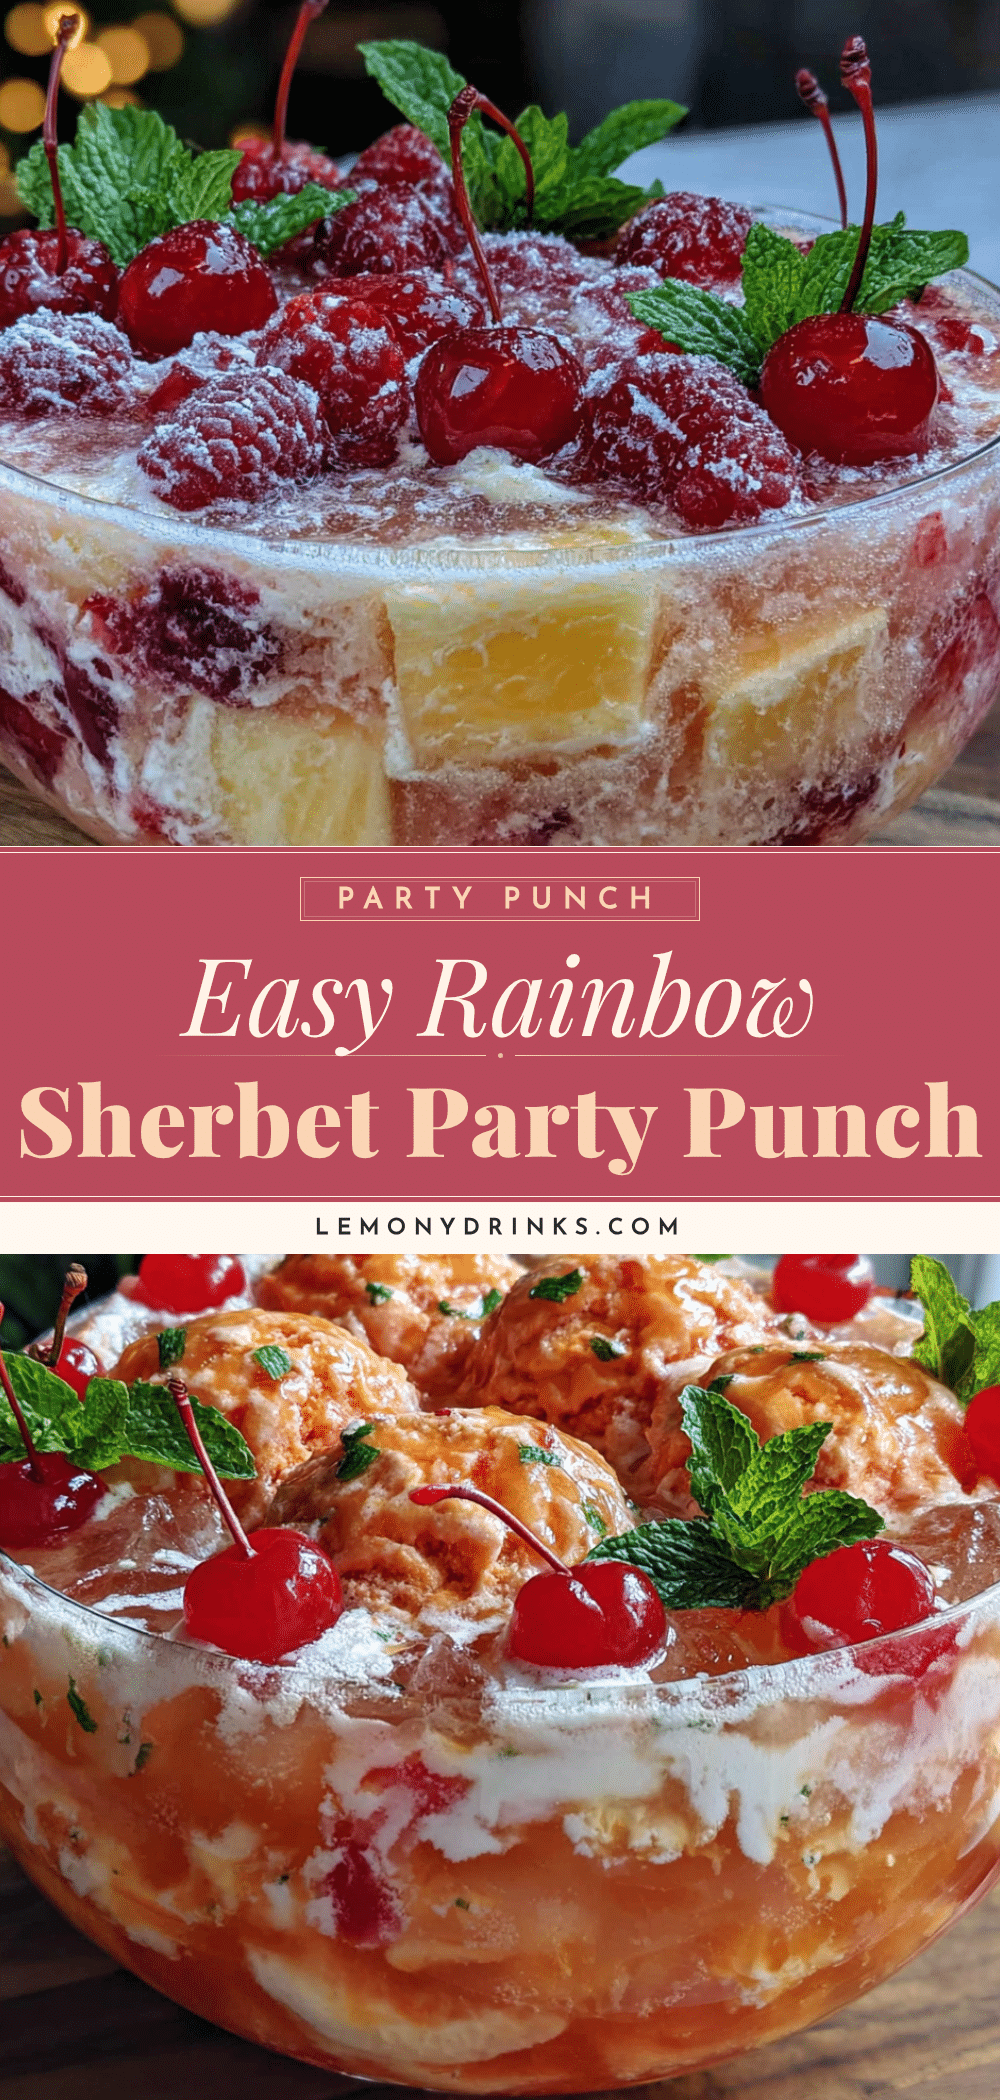
Easy Rainbow Sherbet Punch: Best Party Recipe
A quick and easy three-ingredient rainbow sherbet punch that’s perfect for any party. Creamy, fizzy, and citrusy, this crowd-pleasing drink comes together in minutes and is always the first thing to disappear.
- Prep Time: 5 minutes
- Cook Time: 0 minutes
- Total Time: 5 minutes
- Yield: 12-15 servings 1x
- Category: Beverage
- Cuisine: American
Ingredients
- 1.5 quarts (about 6 cups) rainbow sherbet
- 2 liters lemon-lime soda (such as Sprite or 7UP), chilled
- 2 cups pineapple juice, chilled
- Fresh fruit slices (oranges, lemons, limes, or strawberries) for garnish (optional)
- Splash of grenadine for extra color and sweetness (optional)
- Mint sprigs for garnish (optional)
- 1 cup vodka, white rum, or prosecco for adult version (optional)
Instructions
- Chill the soda and pineapple juice in the refrigerator for at least 4 hours before serving. Keep the sherbet in the freezer until ready to assemble.
- Set up your punch bowl on the serving table. Place a cloth napkin or towel underneath to catch condensation.
- Pour 2 cups of chilled pineapple juice into the punch bowl. If making the adult version, add the alcohol now and stir to combine.
- Slowly pour the entire 2-liter bottle of chilled lemon-lime soda into the bowl. Pour gently to preserve carbonation.
- Using an ice cream scoop, make 6-8 large scoops of rainbow sherbet and gently drop them into the punch bowl. Do not stir yet.
- Let the punch rest for 2-3 minutes to allow the sherbet to start melting and create a creamy layer on top.
- Stir gently once or twice with a ladle to incorporate the melting sherbet without breaking up all the scoops.
- Garnish with fresh fruit slices or mint sprigs if desired.
- Serve immediately, ladling into cups and ensuring each serving gets some of the melting sherbet.
Notes
Keep the sherbet frozen until the last minute to ensure it melts slowly. Don’t over-stir the punch; just a couple of gentle stirs is plenty. For best results, chill all ingredients overnight. If serving for more than an hour, keep extra sherbet in the freezer and add fresh scoops to revive the bubbles. This punch does not store well; serve immediately.
Nutrition
- Serving Size: 6 ounces
- Calories: 180220
- Sugar: 3035
- Sodium: 3050
- Fat: 23
- Saturated Fat: 12
- Carbohydrates: 3540
- Protein: 1
Keywords: rainbow sherbet punch, party punch, easy punch recipe, sherbet punch, 3-ingredient punch, rainbow punch, birthday punch, baby shower punch