“Wait, are these really mimosas?” I remember my friend Rachel’s skeptical glance as she eyed the delicate pastel layers shimmering in the glasses. It was a Sunday brunch that nearly crashed my usual “throw something together” routine, but I wanted something special—something that felt like a secret celebration even if it was just a quiet catch-up. Honestly, I was half-expecting the whole thing to flop, but those layered berry mimosas turned out to be the unexpected star of the morning.
The colors caught everyone’s eye before the first sip did, like little rainbows captured in glass. I never thought layering fruit purees and sparkling wine could look so effortlessly chic, or taste so fresh and balanced. There was a moment when I realized this wasn’t just a pretty drink — it was the kind that makes you pause, lean in, and smile with your eyes closed.
Since then, I found myself making the Perfect Pastel Layered Berry Mimosa Flight over and over, whether for friends who pop in last minute or for those rare, slow mornings when everything feels just right. It’s simple enough that even if you’re not a bartender (hello, me), you can pull it off. But there’s a little something in how each layer settles softly into the next that makes it feel like a treat — a tiny bit of elegance for casual moments.
So, if you’re like me and sometimes want to surprise yourself with a drink that’s more than just poured bubbles and juice, this one’s for you. It’s a quiet kind of magic in a glass, the kind that sticks around in your memory long after the last sip.
Why You’ll Love This Recipe
After testing this recipe several times (okay, maybe too many times in a week), I can say it ticks all the boxes for an easy yet impressive drink to serve at your next get-together. Here’s why it quickly became a go-to for me and many others:
- Quick & Easy: You can have this layered berry mimosa flight ready in under 15 minutes, which is perfect when guests arrive unexpectedly or when you want to impress without fuss.
- Simple Ingredients: No obscure liqueurs or hard-to-find items. The recipe calls for fresh berries, fruit purees, and your favorite sparkling wine—stuff you probably have or can easily grab.
- Perfect for Elegant Gatherings: Whether it’s bridal showers, holiday brunches, or just a fancy weekend treat, these pastel mimosas add that delicate touch everyone notices.
- Crowd-Pleaser: Both kids (mocktail style) and adults rave about the vibrant flavors and the fun of sipping multiple layers without mixing them up immediately.
- Unbelievably Delicious: The interplay of tart berries, subtle sweetness, and bubbly fizz gives you a refreshing yet indulgent sip every time.
What sets this recipe apart? It’s all about the layering technique and the homemade berry purees that keep the flavors bright without overpowering the bubbles. Plus, swapping in seasonal berries lets you customize the colors and tastes with ease. If you’ve tried other fruity mimosas before, this pastel layered approach feels like a refined upgrade—one that’s less about throwing everything together and more about savoring each delicate layer.
Honestly, this recipe has been my little secret for making brunch feel special without turning it into a show. It’s approachable, beautiful, and just a touch playful. You might find yourself wanting to experiment with other fruits or even pairing these with light bites like a flaky croissant or fresh fruit salad.
What Ingredients You Will Need
This Perfect Pastel Layered Berry Mimosa Flight relies on fresh, straightforward ingredients that come together to create a stunning and balanced drink. Most are pantry staples or easy to source, and I’ll share substitution tips to fit your preferences.
- Fresh or Frozen Berries: Strawberries, blueberries, raspberries (about 1 cup each). I usually prefer organic berries from local markets when in season for the best flavor.
- Granulated Sugar: 2-3 tablespoons, adjustable depending on your berry sweetness. You can swap for honey or maple syrup for a natural twist.
- Fresh Lemon Juice: 1 tablespoon. Adds brightness and balances the sweetness. (Use bottled lemon juice only if fresh isn’t available, but fresh is best!)
- Water: 1/4 cup to help blend the berry purees smoothly.
- Orange Juice (Freshly Squeezed Recommended): 1 cup. This classic mimosa base brings in natural sweetness and acidity.
- Sparkling Wine or Champagne: 1 bottle (750 ml). Choose a brut or extra brut for less sweetness, or a demi-sec if you prefer it sweeter. Prosecco works well too, especially for budget-friendly options.
- Optional Garnishes: Fresh mint leaves, edible flowers, lemon or lime slices for that extra elegant touch.
If you’re looking for a non-alcoholic version, sparkling water or a sparkling white grape juice works beautifully to keep the bubbles without the booze. For a seasonal twist, in summer I swap in fresh peaches or cherries with a little splash of brandy for an adult-only version.
For berry purees, I recommend using a high-speed blender or food processor to get a smooth consistency, especially if you want clean layers. I like to strain the puree quickly to avoid seeds that might disrupt the texture, but it’s optional depending on your preference.
Equipment Needed
- High-Speed Blender or Food Processor: Essential for pureeing the berries smoothly. A regular blender works, but I’ve found a high-speed one speeds things up and gives a silkier texture.
- Fine Mesh Sieve or Strainer: For removing seeds from the berry purees if you want that ultra-smooth look and mouthfeel.
- Measuring Cups and Spoons: Accuracy matters here to balance flavors and achieve the perfect layering.
- Champagne Flutes or Tall Glasses: Narrow glasses work best to showcase the layered effect. I prefer flutes because they keep the fizz longer.
- Small Bowls or Containers: For holding the different berry purees before layering.
- Spoon or Small Ladle: To gently layer each puree over the bubbles without mixing them up.
If you don’t have a fine mesh sieve, a clean kitchen towel or coffee filter can do the trick for straining. Also, a simple handheld citrus juicer helps get every last drop from your lemons and oranges, which is worth it for the fresh juice flavor.
Preparation Method
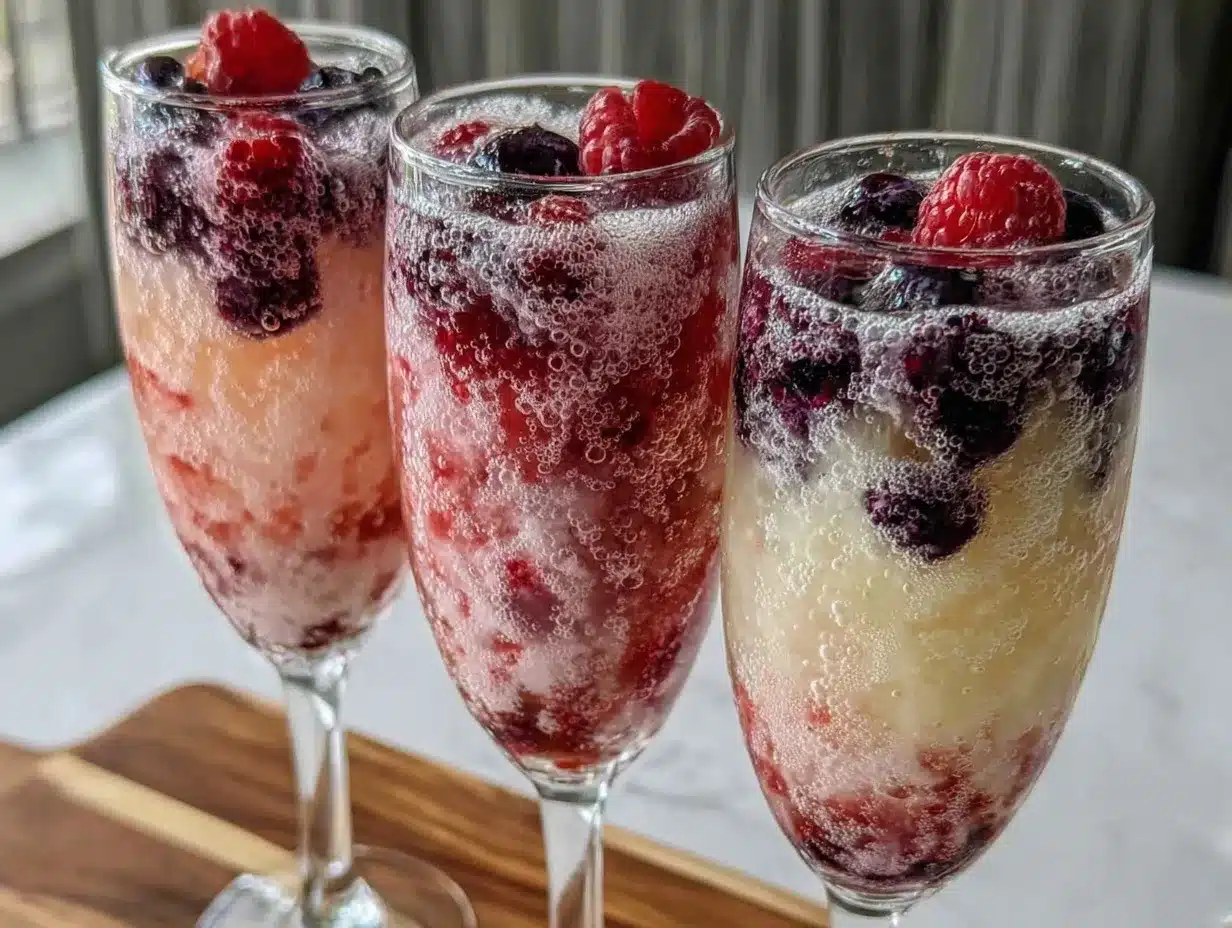
- Prepare the Berry Purees (About 10 Minutes): Rinse the berries well. Separate the strawberries, blueberries, and raspberries into three batches (about 1 cup each). In your blender, combine strawberries with 1 tablespoon sugar and 2 tablespoons water. Blend until smooth. Repeat for blueberries and raspberries, adjusting sugar slightly based on berry sweetness (usually 1 to 1.5 tablespoons). Pour each puree through a fine mesh sieve to remove seeds if you want smoother layers. Set aside in separate bowls.
- Chill Your Ingredients: Make sure your sparkling wine and orange juice are well chilled before assembling. This keeps the bubbles lively and the layers distinct.
- Layer the Mimosa Flight (5-7 Minutes): Pour about 1 ounce (30 ml) of strawberry puree into the bottom of each flute. Then, very gently pour about 2 ounces (60 ml) of chilled sparkling wine over the back of a spoon to form the first bubbly layer without disturbing the puree.
- Next, add 1 ounce (30 ml) of orange juice slowly over the sparkling wine to create the middle layer. Follow immediately with 1 ounce (30 ml) of blueberry puree carefully spooned on top.
- For the final layer, gently pour another 2 ounces (60 ml) of sparkling wine, then top with a 1-ounce (30 ml) raspberry puree. The idea is to keep each layer floating rather than mixing together.
- Garnish and Serve: Add fresh mint sprigs or edible flowers on top. Serve immediately for the best visual and taste experience.
Pro tip: If you notice the layers mixing, chill your puree and sparkling wine longer. Also, pour slowly and use the spoon to soften the pour — it makes all the difference in keeping those pretty pastel stripes intact.
Cooking Tips & Techniques
Layering a mimosa flight might seem tricky at first, but it’s mostly about patience and technique. Here are a few lessons I learned the hard way:
- Chill everything: Warm juices or wine make the layers blend too quickly. Cold ingredients help keep each color distinct.
- Pour over the back of a spoon: This slows the liquid’s flow and prevents it from breaking through the layer below. It’s a bartender’s classic trick that works wonders here.
- Adjust sweetness: Some berries can be tart, others sweet. Taste your purees before assembling and tweak sugar amounts accordingly.
- Strain for smoothness: Seeds can make layers uneven or gritty. Straining isn’t mandatory, but it definitely gives a refined look and mouthfeel.
- Work quickly but gently: The bubbles won’t last forever, so assemble efficiently, but don’t rush to the point of mixing layers.
One time, I tried rushing through the layering and ended up with a pinkish mess at the bottom of the glass. Not my finest moment! Since then, I’ve learned to enjoy the process — it’s part of the charm. Also, if layering feels intimidating, you can always serve the purees and sparkling wine separately for guests to mix as they please, which is a fun interactive option.
Variations & Adaptations
This pastel layered berry mimosa is a versatile canvas for your creativity. Here are some of my favorite twists and ways to tailor it:
- Non-Alcoholic Version: Replace sparkling wine with sparkling water or white grape juice for a festive mocktail. The layers still shine, and everyone can join the fun.
- Seasonal Fruit Swap: In warmer months, swap berries for pureed peaches, mangoes, or cherries. Each brings a new color and flavor palette.
- Herbal Infusions: Add a splash of lavender syrup or mint simple syrup to one layer for a subtle floral note. It pairs wonderfully with the berries.
- Dietary Friendly: Use organic juices and gluten-free sparkling wines to keep it clean and allergy-friendly.
- Personal Favorite: I once tried a version with a splash of elderflower liqueur in the orange juice layer—total game changer for a slightly more complex flavor.
For those who want to experiment with different glasses, small coupe glasses also work well, though the layering effect is more pronounced in flutes. If you’d like a frozen twist, blend the berry purees with ice and layer over chilled sparkling wine for a slushy take.
Serving & Storage Suggestions
Serve your pastel layered berry mimosa flight immediately after assembling to enjoy the fullest sparkle and freshest flavors. These drinks look stunning when showcased on a tray with floral garnishes or alongside light brunch dishes like fresh croissants or a fruit tart.
For pairings, I love serving these with simple finger foods—cheese plates, smoked salmon canapés, or even a batch of cinnamon rolls (like the cinnamon roll iced coffee I tried recently). The sweet and tart notes of the mimosa complement those rich, buttery flavors beautifully.
If you have leftovers (which is rare!), store the berry purees in airtight containers in the fridge for up to 2 days. The sparkling wine should be consumed within a day of opening for best fizz. Avoid pre-mixing layers too far in advance as the colors and textures will blend.
Reheat no part of this drink—it’s best served chilled or at room temperature for the purest taste. Interestingly, the flavors deepen slightly if the purees sit overnight, so if you enjoy a more mellow berry taste, prepare the purees a day ahead and layer before serving.
Nutritional Information & Benefits
While this berry mimosa flight is definitely a treat, it also brings some nutritional perks thanks to its fresh fruit components. Here’s a rough estimate per serving (one flute):
| Nutrient | Amount |
|---|---|
| Calories | 120-150 kcal |
| Carbohydrates | 12-18 g (mostly natural sugars) |
| Vitamin C | 15-20% Daily Value (from berries and citrus) |
| Alcohol | Varies depending on sparkling wine used |
The berries provide antioxidants and vitamins, while the fresh orange juice adds a citrusy vitamin C boost. Choosing a brut sparkling wine keeps sugar lower if you’re mindful of intake. For gluten-free guests, this mimosa flight is a safe choice, and with the non-alcoholic swap, it can suit all ages and preferences.
From my wellness perspective, it’s a way to enjoy a festive drink without excess sugars or artificial flavors. Plus, the fresh fruit means you’re sipping something that tastes like summer sunshine in a glass.
Conclusion
This Perfect Pastel Layered Berry Mimosa Flight is the kind of recipe that sneaks up on you with its charm—simple ingredients, easy to assemble, but stunning in presentation and flavor. It’s become my little secret for turning ordinary gatherings into something memorable without stress or complicated prep.
Feel free to tweak the fruit choices, sweetness levels, or even the glassware to make it truly yours. After all, the best drinks are the ones that fit your style and palate. I love how this recipe brings a touch of elegance and whimsy without feeling out of reach.
If you give it a try, I’d love to hear how you customize your mimosa flights or what occasions you serve them for. There’s something special about sharing a drink that’s as pretty as it is delicious—cheers to many more sparkling moments ahead!
Frequently Asked Questions
Can I prepare the berry purees ahead of time?
Absolutely! You can make the purees up to 2 days in advance and store them in airtight containers in the fridge. Just give them a quick stir before layering.
What sparkling wine works best for this mimosa flight?
I recommend a brut or extra brut for a balanced dryness that pairs well with the sweet fruit purees. Prosecco is a great budget-friendly option that still delivers a nice fizz.
How do I keep the layers from mixing together?
Chilling all ingredients and pouring slowly over the back of a spoon helps keep layers distinct. Also, pouring in the right order—puree first, then sparkling wine, followed by juice and puree again—maintains separation.
Can I make a non-alcoholic version?
Yes! Substitute sparkling wine with sparkling water or white grape juice. The layers still look beautiful and taste refreshing.
Are there any recommended garnishes?
Fresh mint leaves, edible flowers, or thin lemon and lime slices add a lovely visual touch and subtle aroma to each glass.
For those planning a full brunch menu, you might enjoy pairing these mimosas with the strawberry mimosa recipe perfect for brunch parties or even the maple bourbon cider recipe perfect for cozy fall drink for autumn gatherings.
Pin This Recipe!
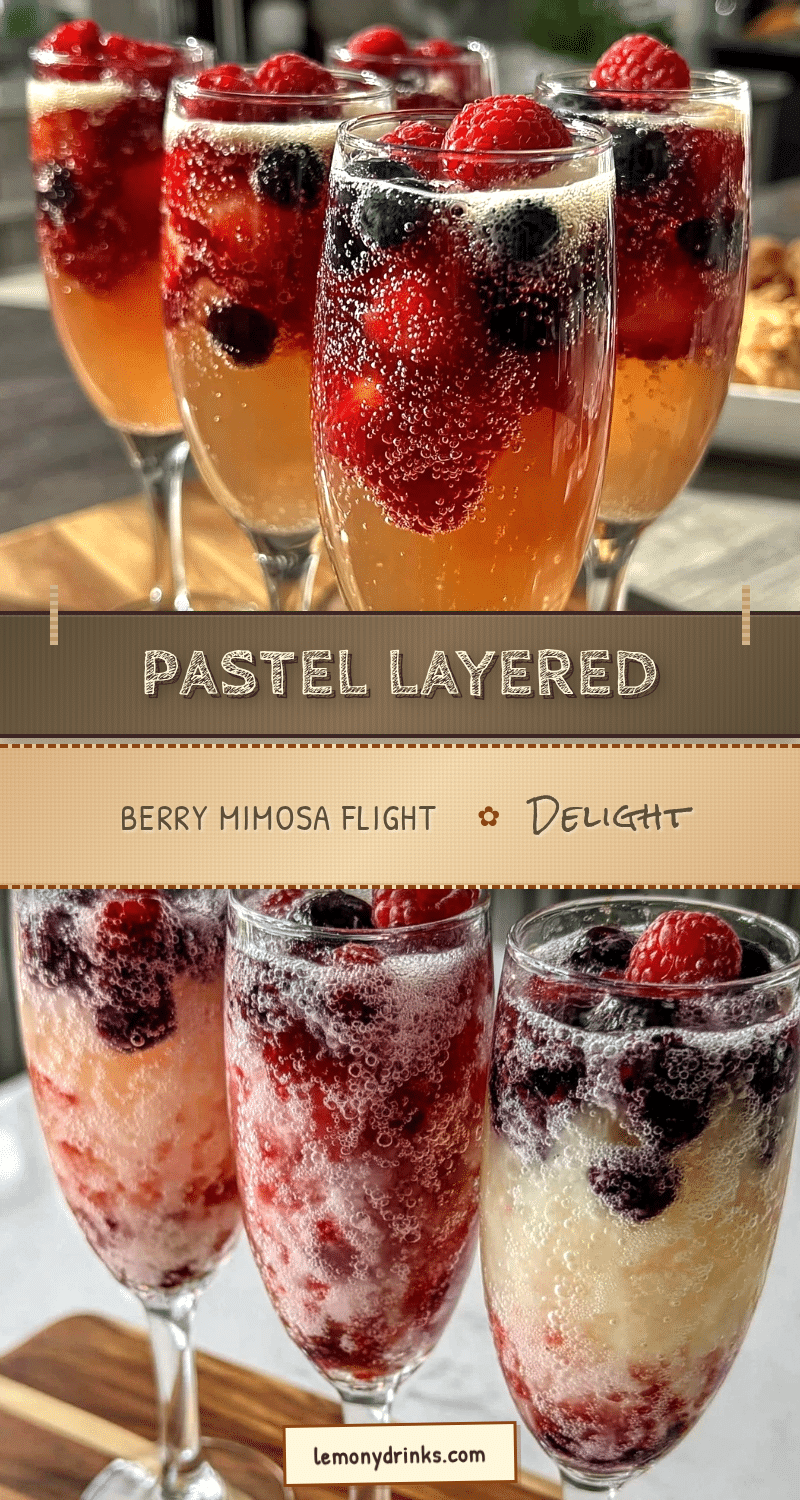
Perfect Pastel Layered Berry Mimosa Flight

A visually stunning and delicious layered berry mimosa flight featuring fresh berry purees and sparkling wine, perfect for elegant gatherings and brunches.
- Prep Time: 10 minutes
- Cook Time: 0 minutes
- Total Time: 15 minutes
- Yield: 6 servings 1x
- Category: Beverage
- Cuisine: American
Ingredients
- 1 cup fresh or frozen strawberries
- 1 cup fresh or frozen blueberries
- 1 cup fresh or frozen raspberries
- 2–3 tablespoons granulated sugar (adjustable)
- 1 tablespoon fresh lemon juice
- 1/4 cup water
- 1 cup freshly squeezed orange juice
- 1 bottle (750 ml) sparkling wine or champagne (brut, extra brut, or demi-sec)
- Optional garnishes: fresh mint leaves, edible flowers, lemon or lime slices
Instructions
- Rinse the berries well and separate into three batches (about 1 cup each).
- In a blender, combine strawberries with 1 tablespoon sugar and 2 tablespoons water. Blend until smooth. Repeat for blueberries and raspberries, adjusting sugar slightly based on berry sweetness (usually 1 to 1.5 tablespoons).
- Pour each puree through a fine mesh sieve to remove seeds if a smoother texture is desired. Set aside in separate bowls.
- Chill the sparkling wine and orange juice well before assembling.
- Pour about 1 ounce (30 ml) of strawberry puree into the bottom of each champagne flute.
- Very gently pour about 2 ounces (60 ml) of chilled sparkling wine over the back of a spoon to form the first bubbly layer without disturbing the puree.
- Slowly add 1 ounce (30 ml) of orange juice over the sparkling wine to create the middle layer.
- Carefully spoon 1 ounce (30 ml) of blueberry puree on top of the orange juice layer.
- Gently pour another 2 ounces (60 ml) of sparkling wine over the blueberry puree.
- Top with 1 ounce (30 ml) of raspberry puree, keeping layers distinct.
- Garnish with fresh mint sprigs, edible flowers, or lemon/lime slices and serve immediately.
Notes
Chill all ingredients thoroughly to keep layers distinct. Pour liquids slowly over the back of a spoon to prevent mixing. Strain purees for a smoother texture if desired. Purees can be made up to 2 days ahead and stored in airtight containers in the fridge. For a non-alcoholic version, substitute sparkling wine with sparkling water or white grape juice.
Nutrition
- Serving Size: 1 flute (approximate
- Calories: 120150
- Sugar: 1218
- Sodium: 510
- Carbohydrates: 1218
- Fiber: 23
- Protein: 1
Keywords: mimosa, layered mimosa, berry mimosa, brunch drink, pastel mimosa, sparkling wine cocktail, non-alcoholic mimosa, elegant drink