
“You can’t actually drink that, right?” My sister-in-law was staring at the jar of dark, murky liquid on my counter like it might crawl out and chase her. She’d come over to borrow my stand mixer and instead found me elbow-deep in a pile of ginger, turmeric roots, and garlic cloves that looked more like a science experiment than anything edible. “Oh, I’m definitely drinking it,” I said, dropping another chunk of horseradish into the blender. “And so are you, the second your throat starts tickling.” She laughed and backed away slowly, but two weeks later, when that familiar scratchy feeling showed up right before her big work presentation, she texted me: “Okay, fine. Send me the recipe.” That was three years ago, and I haven’t bought a single bottle of store-bought immunity stuff since.
Honestly, I stumbled into making my own quick fire cider immunity shots out of pure stubbornness. I was tired of spending eight bucks on tiny glass bottles of spicy vinegar blends that tasted like regret and disappeared in two sips. There had to be a better way, right? So I raided my fridge, grabbed every pungent thing I could find, and started experimenting. The first batch was, let’s just say, aggressive. Too much garlic, not enough apple cider vinegar, and a horseradish situation that cleared my sinuses for three days. But I kept tweaking, kept tasting, and eventually landed on something that actually works—and tastes decent enough that I look forward to taking it.
These little shots have become my cold-weather insurance policy. Every time I feel that first hint of something coming on, or after a day spent in crowded places (hello, holiday shopping), I take a quick shot and hope for the best. And more often than not, whatever was trying to take hold just… doesn’t. Maybe it’s placebo, maybe it’s the potent combination of antimicrobial ingredients, honestly I don’t care. It works. And knowing I made it myself for pennies feels like a small victory every single time.
Why You’ll Love This Recipe
I’ve tested this quick fire cider immunity shots recipe through three cold seasons, two bouts of weird travel sniffles, and one particularly aggressive flu season where everyone around me was dropping like flies. I stayed standing. That’s not a brag—it’s just what happened. And I think this stuff had something to do with it.
- Ready in 5 Minutes: No steeping, no waiting weeks for fermentation. This is a fire cider that’s ready the moment you blend it. I know traditional fire cider sits for a month, but who has time for that when you’re already feeling run down?
- Simple Ingredients: You probably have most of these in your kitchen right now. Apple cider vinegar, ginger, garlic, turmeric, lemon, honey—these are not exotic finds. No special trips to health food stores required.
- Perfect for Cold Season: Whether you’re trying to prevent something or you’re already in the thick of it, these shots are my go-to. They’re great for travel too—I’ve made mini batches to take on flights.
- Crowd-Pleaser (Seriously): Everyone who tries these ends up asking for the recipe. Even my skeptical sister-in-law now keeps a jar in her fridge at all times. The trick is balancing the heat so it’s potent but not punishing.
- Unbelievably Effective: The combination of raw apple cider vinegar, fresh ginger, turmeric, garlic, and horseradish creates a powerhouse of immune-supporting compounds. Plus, raw honey adds natural antimicrobial benefits and makes it all go down easier.
What makes this recipe different from every other fire cider recipe out there? It’s the ratio. Most recipes lean too heavy on the vinegar or go overboard with the garlic. I spent months dialing in the perfect balance—enough heat to feel like it’s working, enough sweetness to make it palatable, and a consistency that blends smoothly instead of leaving you chewing chunks of ginger. This isn’t just another version of fire cider. It’s the one I actually want to take every day.
This recipe is the kind that makes you feel like you’re doing something good for yourself without it feeling like a chore. It’s comfort for your immune system—spicy, warming, and strangely satisfying. Perfect for mornings when you need a little extra armor, or evenings when you feel something creeping in.
What Ingredients You Will Need
This quick fire cider immunity shots recipe uses simple, everyday ingredients that come together to create something genuinely powerful. No obscure superfood powders or expensive adaptogens here—just real food doing what real food does best.
- Raw Apple Cider Vinegar (with the mother): This is non-negotiable. Bragg’s is my go-to, but any raw, unfiltered apple cider vinegar works. The mother contains beneficial bacteria and enzymes that support gut health and immunity. You’ll need about 1 cup (240 ml).
- Fresh Ginger Root (2-inch piece, peeled): Ginger adds warmth and that signature zing. It’s anti-inflammatory and helps settle your stomach if the vinegar feels harsh. Look for firm, smooth-skinned ginger without wrinkly spots. Older ginger is fine—just peel more aggressively.
- Fresh Turmeric Root (1-inch piece, peeled): Turmeric is the golden child of anti-inflammatory ingredients. Fresh turmeric has a much brighter, earthier flavor than dried powder. It stains everything it touches, so wear an apron and maybe use a dedicated cutting board. If you can’t find fresh, use 1 teaspoon of dried turmeric powder instead.
- Garlic Cloves (3-4 large cloves): Garlic is antimicrobial and adds serious depth. I use fresh cloves only—pre-minced jarred garlic won’t have the same potency. For a milder flavor, remove the green germ from the center of each clove.
- Fresh Horseradish Root (1-inch piece, peeled): This is the secret weapon. Horseradish clears your sinuses like nothing else and contains compounds that support respiratory health. If you can’t find fresh horseradish, substitute 1 tablespoon of prepared horseradish (drained).
- Fresh Lemon Juice (from 1 medium lemon): Lemon adds brightness and vitamin C. Always use fresh—bottled lemon juice has a flat, almost metallic taste that throws off the whole shot.
- Raw Honey (2-3 tablespoons): Raw honey balances the acidity and heat while adding its own antimicrobial properties. Local raw honey is ideal for seasonal allergy support. Adjust the amount based on how sweet you like things. I use 2 tablespoons for a balanced flavor.
- Ground Black Pepper (¼ teaspoon): This is crucial for turmeric absorption. Piperine in black pepper increases curcumin absorption by up to 2000%. Don’t skip it.
- Cayenne Pepper (⅛ teaspoon, optional): Adds extra heat and metabolic boost. I add it when I feel like I need extra support, but it’s completely optional. Start with a pinch and adjust from there.
- Filtered Water (½ cup / 120 ml): Helps thin the mixture so it blends smoothly and isn’t overwhelmingly vinegar-heavy.
I recommend using organic ingredients where possible, especially for the ginger, turmeric, and lemon—you’re not cooking these, so whatever’s on the skin ends up in your shot. That said, conventional works fine too. Just wash everything thoroughly.
Equipment Needed
You don’t need much for this quick fire cider immunity shots recipe, which is part of why I love it. No fancy appliances required.
- High-Speed Blender: A Vitamix or Blendtec works beautifully, but any decent blender will do. I’ve made this in a $30 NutriBullet with great results. The key is blending until completely smooth—no chunks.
- Fine-Mesh Strainer or Nut Milk Bag: You’ll need this to strain out the fibrous bits. A fine-mesh strainer works fine, but a nut milk bag makes it even easier to squeeze out every last drop.
- Glass Jar or Bottle for Storage: A 16-ounce Mason jar works perfectly. Make sure it’s clean and completely dry before filling. Dark glass is ideal for preserving potency, but clear glass works too if you store it in the fridge.
- Small Shot Glasses: For serving. I use 2-ounce glass shot glasses. You can also use small juice glasses or even a tablespoon measure in a pinch.
- Cutting Board and Sharp Knife: For prepping the ginger, turmeric, garlic, and horseradish. A microplane or zester can be helpful for the ginger and turmeric, but a sharp knife does the job.
- Vegetable Peeler: For peeling the ginger and turmeric. A spoon also works for ginger—just scrape the skin off.
I’ve made this recipe with a cheap blender and a dish towel for straining when I was traveling. It’s forgiving. Don’t let missing equipment stop you.
Preparation Method

Making these quick fire cider immunity shots is genuinely fast. The whole process takes about five minutes from start to finish, and most of that is just chopping.
- Prep your ingredients. Peel the ginger, turmeric, and horseradish. Roughly chop them into small chunks—about ½-inch pieces. This helps the blender break them down more easily. Peel the garlic cloves and leave them whole. Juice the lemon and set the juice aside.
- Add everything to the blender. Start with the liquid ingredients: pour in the raw apple cider vinegar, filtered water, and fresh lemon juice. Then add the chopped ginger, turmeric, horseradish, and garlic cloves. Add the raw honey, black pepper, and cayenne if using.
- Blend on high for 30-45 seconds. Start on low speed and gradually increase to high. Blend until the mixture looks smooth and uniform. You should see tiny specks of turmeric and ginger throughout. If it seems too thick, add another tablespoon of water. If it’s too thin, that’s fine too—it will still work.
- Taste and adjust. Dip a clean spoon in and take a tiny taste. It should be spicy, sour, slightly sweet, and warming. If it’s too acidic, add a little more honey. If it’s not spicy enough, add more ginger or cayenne. If it’s too spicy, add more water and a touch more honey. Trust your palate.
- Strain the mixture. Place your fine-mesh strainer or nut milk bag over a bowl or directly over your storage jar. Pour the blended mixture through. Use a spatula to press down on the solids, extracting as much liquid as possible. If using a nut milk bag, twist the top and squeeze firmly. You should end up with about 1½ cups of liquid.
- Pour into your storage jar. Transfer the strained liquid to a clean glass jar or bottle. Seal tightly and give it a gentle shake to combine. The mixture will separate slightly as it sits—that’s normal. Just shake before each use.
- Store in the refrigerator. This mixture needs to stay cold. It will keep for up to 2 weeks in the fridge. The flavor actually mellows and melds after about 24 hours, so it might taste even better on day two.
Pro tip: If you want an even smoother shot, let the blended mixture sit for 10 minutes before straining. This allows the fibers to soften and release more liquid. I do this when I’m making a larger batch and want every last drop.
Warning: Turmeric stains everything it touches—countertops, cutting boards, clothing, your fingers. I learned this the hard way when I wore a white apron. Wear dark clothes and clean up immediately after blending.
Cooking Tips & Techniques
I’ve made this quick fire cider immunity shots recipe dozens of times, and I’ve learned a few things the hard way so you don’t have to.
The biggest mistake people make is using too much garlic. I know it’s antimicrobial and all that, but four cloves is plenty. I once used six cloves thinking “more is better” and ended up with shots that tasted like garlic soup. My breath was offensive for two days. Stick to 3-4 cloves and you’ll get the benefits without alienating everyone in a three-foot radius.
Don’t skip the straining step. I know it seems like an extra hassle, but unstrained fire cider shots have a gritty, fibrous texture that’s genuinely unpleasant. The ginger and horseradish fibers don’t break down completely in a blender, and chewing your shot is not a fun experience. Strain it. Your throat will thank you.
Let the honey dissolve completely. If you add honey to cold vinegar, it tends to clump at the bottom. I like to warm the honey slightly before adding it—just set the jar in a bowl of warm water for a minute. Or blend the honey with the vinegar first before adding the solids. Either way, make sure it’s fully incorporated.
Batch size matters. This recipe makes about 12-14 shots, which lasts me about two weeks. If you’re making it for one person, that’s perfect. If you’re making it for a family, double the recipe. The mixture keeps well in the fridge, so don’t be afraid to make a bigger batch.
Timing is everything. I take one shot first thing in the morning on an empty stomach, and another at the first sign of any cold symptoms. Some people take it daily as a preventive measure. I do that during peak cold season—usually November through February—and then take it as needed the rest of the year.
One thing I wish I’d known earlier: The flavor changes over time. On day one, it’s sharp and aggressive. By day three, it mellows into something almost pleasant. Don’t judge it on day one. Give it a chance to settle.
Variations & Adaptations
One of the best things about this quick fire cider immunity shots recipe is how adaptable it is. Here are some variations I’ve tried and loved.
- Milder Version for Sensitive Stomachs: If the vinegar is too harsh on your stomach, reduce the vinegar to ¾ cup and increase the water to ¾ cup. You can also add an extra tablespoon of honey. The flavor will be less acidic and more palatable for morning consumption.
- Extra Spicy “Deep Cleanse” Version: When I feel something really trying to take hold, I double the ginger and add a full ¼ teaspoon of cayenne. I call this the “nuclear option.” It clears your sinuses instantly and makes you feel alive—whether you want to or not.
- Kid-Friendly Version: My niece wanted to try it (she’s six and weirdly adventurous), so I made a version with ½ cup apple juice instead of water, an extra tablespoon of honey, and no cayenne. She called it “spicy apple juice” and asked for more. If you’re making this for kids, start with very small amounts—like a teaspoon—and see how they handle it.
- Winter Wellness Variation: Add a 2-inch cinnamon stick and 3 whole cloves to the blender. These add warming, antimicrobial properties and a subtle holiday spice flavor. Strain them out with the rest of the solids.
- Citrus Boost Variation: Replace half the water with fresh orange juice and add the zest of one orange. This adds extra vitamin C and a brighter, fruitier flavor that balances the heat beautifully.
I’ve also tried this recipe with different vinegars—white wine vinegar, champagne vinegar, even balsamic (don’t do that, it’s weird). Raw apple cider vinegar is truly the best. It has the right acidity, the right flavor profile, and those beneficial probiotics from the mother.
Serving & Storage Suggestions
These quick fire cider immunity shots are best served cold, straight from the fridge. The cold temperature helps mellow the intensity of the spices and makes them go down smoother.
How to serve: Pour a 1-2 ounce shot into a small glass. Take it like you would any other shot—quickly and without overthinking it. Some people like to chase it with a slice of orange or a spoonful of honey if the heat is too much. I personally just take it and move on with my day.
Best time to take it: First thing in the morning on an empty stomach is ideal. The vinegar helps kickstart digestion, and the immune-supporting compounds are absorbed more effectively without food interference. If you’re taking it preventively, once a day is plenty. If you’re actively fighting something, take it in the morning and again in the evening.
Storage instructions: Keep the mixture in a sealed glass jar in the refrigerator at all times. It will stay fresh for up to 2 weeks. After that, the potency starts to decline and the flavor becomes less pleasant. I always label my jar with the date I made it so I know when it’s time to make a new batch.
Freezing option: You can freeze this mixture in ice cube trays for longer storage. Pop out the cubes and store them in a freezer bag. To use, let a cube thaw in the fridge overnight or drop it into a small glass and let it melt at room temperature for about 15 minutes. The texture might be slightly different after freezing, but the potency remains.
How flavors develop: The first day, this mixture is sharp and almost aggressive. By day three, the flavors have melded and mellowed into something much more balanced. I actually prefer it after it’s had a few days to sit. The honey integrates more fully, the garlic becomes less punchy, and the ginger and turmeric settle into a harmonious warmth.
For travel: I’ve taken this on flights in a small 3-ounce travel bottle (TSA approved). It’s been a lifesaver for avoiding airplane colds. Just make sure the bottle is sealed tightly—vinegar smells strong if it leaks.
Nutritional Information & Benefits
These quick fire cider immunity shots aren’t a meal replacement or a magic cure, but they do pack a serious nutritional punch for something so small.
Estimated per 2-ounce shot: Approximately 25-35 calories, less than 1g fat, 7g carbohydrates (mostly from honey), 0g protein, and minimal sodium. The exact numbers depend on your honey quantity and specific ingredients.
Key health benefits: Raw apple cider vinegar supports healthy digestion and blood sugar regulation. Ginger contains gingerol, a powerful anti-inflammatory compound. Turmeric’s curcumin is a potent antioxidant, especially when paired with black pepper. Garlic has allicin, which has been studied for its antimicrobial properties. Horseradish contains glucosinolates that support respiratory health. Raw honey offers natural antimicrobial benefits and soothes sore throats. Lemon provides vitamin C and antioxidants.
Dietary considerations: This recipe is naturally gluten-free, dairy-free, and vegan if you substitute the honey with maple syrup or agave (though I prefer honey for its specific benefits). It’s low in calories and sugar compared to most store-bought immunity products.
Potential allergens: None of the common top allergens are present, but if you have sensitivities to any of the ingredients, obviously skip them. The cayenne and horseradish can be omitted if you’re sensitive to spicy foods.
I’m not a doctor or nutritionist, and this isn’t medical advice. But I can tell you that since I started making these shots, I’ve noticed I get sick less often, and when I do catch something, it’s milder and shorter. For me, that’s enough.
Conclusion
This quick fire cider immunity shots recipe has become a staple in my kitchen for good reason. It’s fast, it’s affordable, and it actually makes me feel like I’m doing something proactive for my health. No fancy equipment, no expensive supplements, no waiting weeks for fermentation. Just real ingredients and five minutes of your time.
I love that this recipe is so easy to customize. Maybe you want it spicier, or milder, or with a citrus twist. Maybe you’re making it for your kids or for travel or just for your own morning routine. Whatever you need, this recipe can adapt. That’s the beauty of making things yourself—you’re in control.
If you try this recipe, I’d love to hear how it goes. Did you add extra ginger? Skip the cayenne? Make a double batch for the whole family? Drop a comment below and let me know. And if you’re looking for another cozy, immune-supporting drink, you might enjoy this maple bourbon cider recipe for those chilly evenings when you want something warming and delicious. Or try this apple cider hot toddy recipe for a soothing nightcap that feels like a hug in a mug.
Stay healthy out there, friends. And remember—sometimes the best medicine is the stuff you make yourself.
Frequently Asked Questions
Can I use dried turmeric instead of fresh?
Yes, absolutely. Use 1 teaspoon of dried turmeric powder in place of the 1-inch fresh piece. The flavor will be slightly earthier and less bright, but it still works great. Just make sure you don’t skip the black pepper—it’s even more important with dried turmeric for absorption.
How long do these shots last in the fridge?
They stay fresh for up to 2 weeks when stored in a sealed glass jar in the refrigerator. The flavor actually improves after a few days as the ingredients meld together. After 2 weeks, the potency starts to decline and the taste becomes less pleasant. I always make a fresh batch every two weeks during cold season.
Can I make this without a blender?
You can, but it takes more effort. Finely grate the ginger, turmeric, horseradish, and garlic using a microplane or the fine side of a box grater. Combine all ingredients in a jar, shake vigorously, and let it sit for 24 hours before straining. The flavor won’t be as intense as the blended version, but it still works. I’ve done this while camping and it was fine.
Is it safe to take these shots every day?
For most people, yes. But raw apple cider vinegar is acidic, so if you have sensitive teeth, you might want to drink it through a straw to protect your enamel. Also, if you have stomach ulcers, acid reflux, or are on certain medications (like blood thinners or diabetes medications), check with your doctor first. I take it daily during cold season and take breaks when I’m feeling strong.
Can I use this recipe for kids?
Yes, but with modifications. For kids, I recommend making the kid-friendly version I mentioned above—replace water with apple juice, add extra honey, and skip the cayenne. Start with very small amounts, like 1 teaspoon, and see how they handle it. Always consult your pediatrician before giving any herbal remedies to children, especially if they have any health conditions or are on medication.
Pin This Recipe!
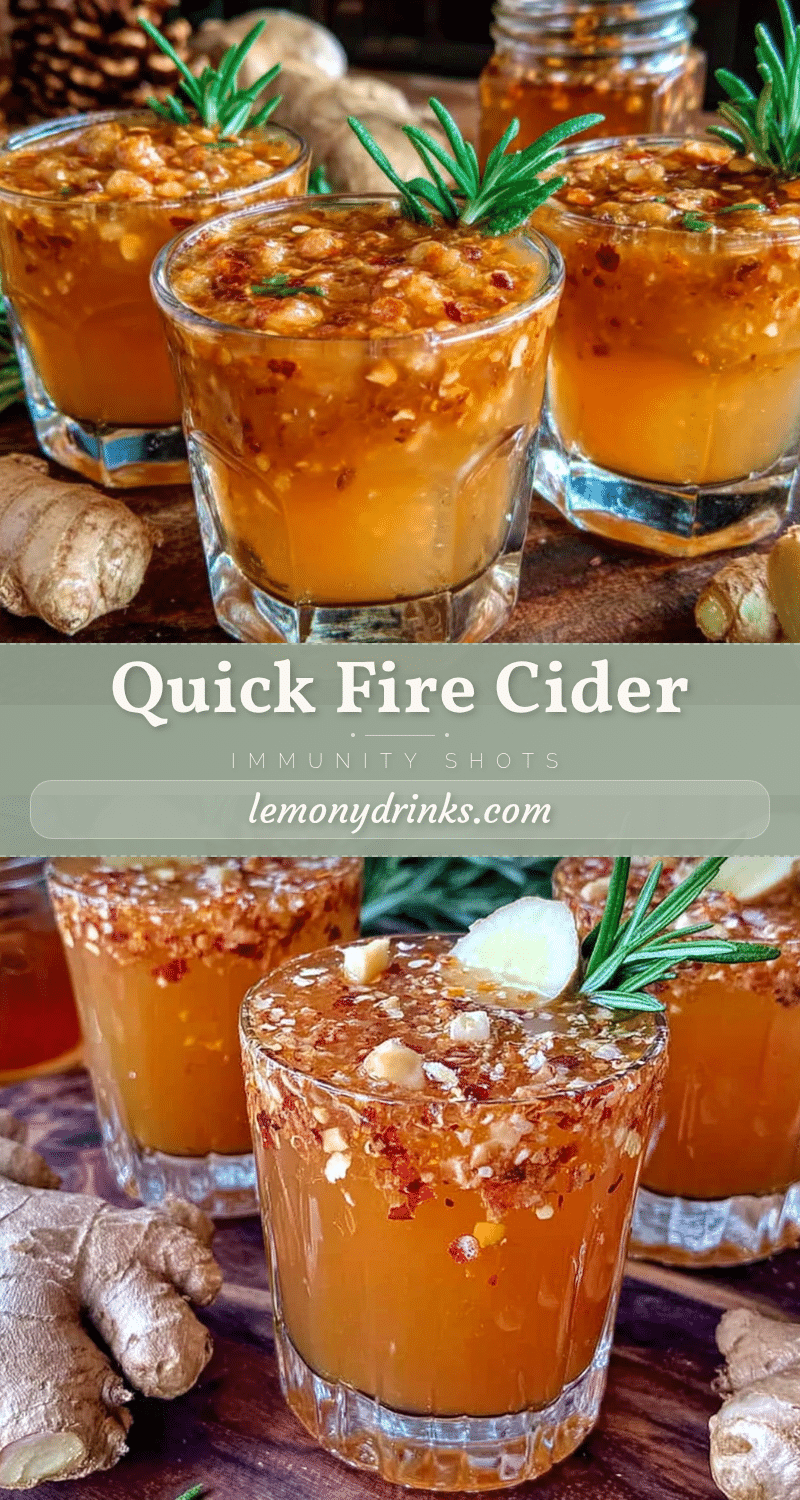
Quick Fire Cider Immunity Shots: Easy 5-Minute Recipe

These quick fire cider immunity shots are a fast, affordable, and effective way to support your immune system using simple ingredients like apple cider vinegar, ginger, turmeric, garlic, and honey. Ready in just 5 minutes, they’re perfect for cold season or whenever you need a little extra armor.
- Prep Time: 5 minutes
- Cook Time: 0 minutes
- Total Time: 5 minutes
- Yield: 12-14 servings (2-ounce shots) 1x
- Category: Beverage
- Cuisine: American
Ingredients
- 1 cup (240 ml) raw apple cider vinegar (with the mother)
- 2-inch piece fresh ginger root, peeled
- 1-inch piece fresh turmeric root, peeled
- 3–4 large garlic cloves
- 1-inch piece fresh horseradish root, peeled
- Juice of 1 medium lemon
- 2–3 tablespoons raw honey
- ¼ teaspoon ground black pepper
- ⅛ teaspoon cayenne pepper (optional)
- ½ cup (120 ml) filtered water
Instructions
- Prep your ingredients. Peel the ginger, turmeric, and horseradish. Roughly chop them into small chunks—about ½-inch pieces. Peel the garlic cloves and leave them whole. Juice the lemon and set the juice aside.
- Add everything to the blender. Start with the liquid ingredients: pour in the raw apple cider vinegar, filtered water, and fresh lemon juice. Then add the chopped ginger, turmeric, horseradish, and garlic cloves. Add the raw honey, black pepper, and cayenne if using.
- Blend on high for 30-45 seconds. Start on low speed and gradually increase to high. Blend until the mixture looks smooth and uniform. If it seems too thick, add another tablespoon of water.
- Taste and adjust. Dip a clean spoon in and take a tiny taste. It should be spicy, sour, slightly sweet, and warming. If it’s too acidic, add a little more honey. If it’s not spicy enough, add more ginger or cayenne. If it’s too spicy, add more water and a touch more honey.
- Strain the mixture. Place your fine-mesh strainer or nut milk bag over a bowl or directly over your storage jar. Pour the blended mixture through. Use a spatula to press down on the solids, extracting as much liquid as possible. If using a nut milk bag, twist the top and squeeze firmly.
- Pour into your storage jar. Transfer the strained liquid to a clean glass jar or bottle. Seal tightly and give it a gentle shake to combine.
- Store in the refrigerator. This mixture needs to stay cold. It will keep for up to 2 weeks in the fridge. Shake before each use.
Notes
Turmeric stains everything—wear dark clothes and clean up immediately. The flavor mellows after a few days; don’t judge it on day one. For a smoother shot, let the blended mixture sit for 10 minutes before straining. If you have sensitive teeth, drink through a straw to protect enamel. Consult a doctor if you have stomach ulcers, acid reflux, or are on certain medications.
Nutrition
- Serving Size: 2 ounces
- Calories: 2535
- Sugar: 6
- Sodium: 5
- Carbohydrates: 7
Keywords: fire cider, immunity shots, apple cider vinegar, ginger, turmeric, garlic, horseradish, cold season, immune support, quick recipe