Introduction
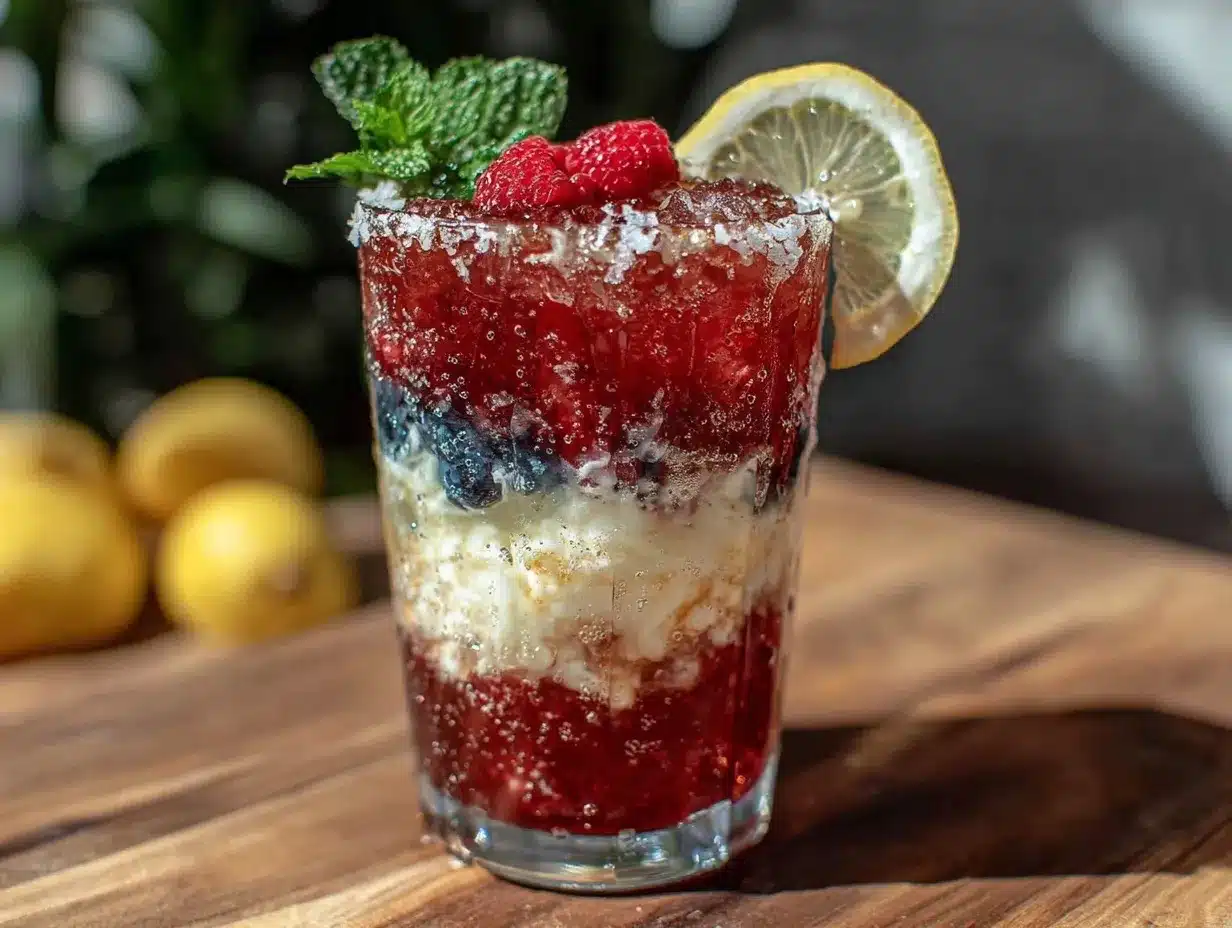
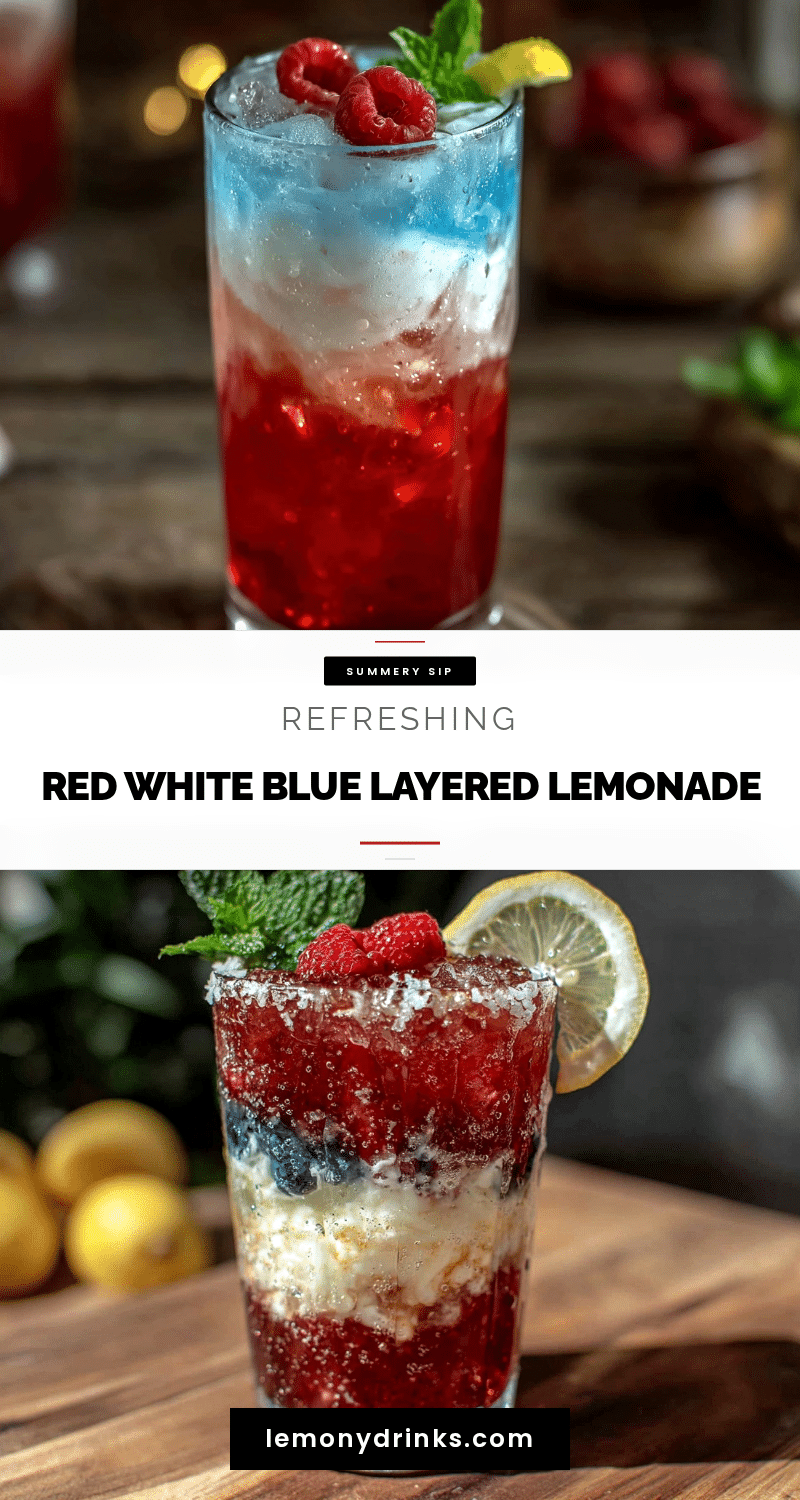
“You’ve got to see this drink!” my neighbor shouted over the fence one hot afternoon last summer. I was midway through wrestling with a blender that refused to cooperate, and honestly, I was skeptical. A layered lemonade? Sounds like one of those fancy, complicated drinks from a café — not something I’d tackle on a busy day. But curiosity got the better of me, and soon enough, I had my hands on a tall glass filled with vibrant red, white, and blue layers that looked like a liquid sunset in slow motion.
The best part? It wasn’t just about looks. Each sip brought a fresh burst of fruity sweetness, tangy citrus, and subtle coolness that felt like a mini summer escape. That first experience with this Refreshing Red White and Blue Layered Lemonade Recipe was a surprise win, perfect for cooling down and impressing guests without any fuss. Since then, I’ve found myself making it over and over — especially when friends drop by unexpectedly or when I need a splash of color on a lazy afternoon. It’s a simple recipe that somehow feels like a celebration in a glass, and it’s stuck with me ever since.
It’s not just the layers that captivate me but the way it brings a little joy and whimsy to everyday moments. If you want a drink that’s both easy to make and visually stunning, this lemonade has your name written all over it. Let’s just say, once you try it, you might find yourself making it as often as I do — because some recipes are just too good to keep to yourself.
Why You’ll Love This Recipe
After testing this Refreshing Red White and Blue Layered Lemonade Recipe several times, I can honestly say it’s become a go-to for casual get-togethers and festive days alike. Here’s why it’s a keeper:
- Quick & Easy: You can have all three layers ready in about 15 minutes, making it perfect for those last-minute summer cravings or unexpected guests.
- Simple Ingredients: No fancy or hard-to-find items here — just everyday fruits, lemon juice, and sugar. I usually grab berries from my local farmers’ market, but frozen works well, too.
- Perfect for Summer Celebrations: Whether it’s the Fourth of July, a backyard barbecue, or just a sunny afternoon, this drink adds a festive splash without the fuss.
- Crowd-Pleaser: Kids and adults alike love the sweet, tangy, and refreshing combo. It’s a hit at parties, and the layered look always sparks a few “wow” moments.
- Unbelievably Delicious: The layers aren’t just for show — each one delivers a unique flavor and texture. The balance between tart lemonade and sweet berry syrups is spot on.
What sets this recipe apart is the layering technique. Instead of mixing everything together, the layers stay beautifully distinct, turning a simple lemonade into a festive showstopper. Plus, I’ve tweaked the sweetness and tartness after many rounds until it felt just right — not too sugary, with a fresh zing that wakes up your taste buds. Honestly, it’s like a little party in every glass.
And if you’re into other refreshing summer drinks with a bit of flair, you might want to try my irresistible cherry limeade or a classic margarita recipe for your next gathering.
What Ingredients You Will Need
This recipe uses simple, wholesome ingredients to deliver bold flavor and satisfying texture without the fuss. Most are pantry staples, and a few fresh or frozen berries bring in the vibrant colors and fruitiness. Here’s what you’ll need:
- For the Red Layer:
- Fresh or frozen strawberries, about 1 cup (hulled and sliced)
- Granulated sugar, 2 tablespoons (adjust for sweetness)
- Water, ½ cup (for simmering strawberries)
- For the White Layer (Classic Lemonade):
- Freshly squeezed lemon juice, 1 cup (about 4-5 lemons)
- Granulated sugar, ¾ cup
- Cold water, 4 cups
- For the Blue Layer:
- Blueberries, fresh or frozen, 1 cup
- Granulated sugar, 2 tablespoons
- Water, ½ cup (for simmering blueberries)
- Additional:
- Ice cubes (lots!)
- Fresh mint leaves or lemon slices for garnish (optional)
For the best results, I recommend using ripe, sweet strawberries and fresh blueberries from a trusted brand or local market. If you want to keep it simple, frozen berries work just fine and often save prep time. For a twist, you can swap regular sugar for honey or agave syrup, but I find granulated sugar helps keep the layers clear and vibrant.
Also, if you’re looking for a gluten-free and vegan-friendly summer treat, this recipe fits right in. Just make sure your sugar is vegan-certified if that matters to you. For a lighter version, cut back on the sugar or try a natural sweetener alternative.
Equipment Needed
- Medium saucepan – for simmering the berry syrups
- Fine mesh strainer or sieve – to strain berry pulp for smooth layers
- Measuring cups and spoons – precise measurements keep layers balanced
- Large pitcher or tall clear glasses – to assemble and serve the lemonade
- Blender or food processor (optional) – if you prefer to puree berries quickly
- Long spoon or stirrer – for layering without mixing
If you don’t have a fine mesh strainer, a clean kitchen towel works as a handy alternative to get a smooth syrup. For pitchers, I find tall, narrow ones show off the layers best, but regular glasses can be just as fun. Personally, I avoid electric blenders here to keep the berry syrups more textured, but if you’re short on time, a quick puree works fine.
Maintaining your strainer by rinsing immediately after use keeps it clog-free, especially when working with sticky berry juices. And if budget is a concern, you can easily skip fancy tools and still get great results with just a saucepan and spoon.
Preparation Method
- Make the Red Strawberry Syrup (about 10 minutes): In a medium saucepan, combine 1 cup strawberries, 2 tablespoons sugar, and ½ cup water. Bring to a gentle simmer over medium heat, stirring occasionally. Let it cook for about 7 minutes until the strawberries soften and the mixture turns syrupy. Remove from heat.
- Strain the Red Syrup: Pour the mixture through a fine mesh strainer into a bowl, pressing gently with a spoon to extract as much juice as possible. Discard the solids. Let the syrup cool completely in the fridge (about 15 minutes).
- Prepare the Classic Lemonade (white layer): In a large pitcher, combine 1 cup freshly squeezed lemon juice, ¾ cup sugar, and 4 cups cold water. Stir well until the sugar dissolves completely. Chill in the fridge while you prepare the blue layer.
- Make the Blue Blueberry Syrup (about 10 minutes): Repeat the simmering process with 1 cup blueberries, 2 tablespoons sugar, and ½ cup water. Simmer for 7 minutes, mash berries lightly, then strain through the mesh to remove solids. Chill the syrup thoroughly.
- Assemble the Layers: Fill your serving glass or pitcher with ice cubes to the top. Slowly pour the red strawberry syrup first, about ⅓ of the glass volume. Let it settle for a minute.
- Next, carefully layer the lemonade over the back of a spoon to prevent mixing. Pour slowly to fill the glass another third. Allow the layers to stay separate by pouring gently.
- Finally, add the blue blueberry syrup as the top layer using the same spoon technique. You should see three distinct red, white, and blue layers.
- Garnish and Serve: Add a few fresh mint leaves or a thin lemon wheel on top for a pop of freshness. Serve immediately for best visual effect and chilled taste.
Tip: If the layers start to blend, your syrups might be too warm or poured too quickly. Patience is key here — chilled syrups and slow pouring make all the difference. Also, using dense ice cubes helps separate the layers better.
Cooking Tips & Techniques
Layering drinks can be a bit intimidating at first, but it’s really about controlling density and temperature. Syrups with more sugar are denser and will naturally sink below less dense liquids. That’s why the red and blue berry syrups are thicker than the lemonade — it helps keep them separate and vibrant.
One mistake I made early on was rushing the cooling process. Warm syrups tend to mix together, ruining the layered effect. Give yourself time to chill each syrup in the fridge or even briefly in the freezer (watch carefully so they don’t freeze solid).
When pouring, the back of a spoon is your best friend. It diffuses the liquid’s flow and prevents it from crashing down into the layers below. Slow and steady wins the race here.
Also, fresh lemon juice is a game-changer. Bottled lemon juice just doesn’t have the same brightness or zip, and it can dull the layers’ clarity.
Lastly, keep your ice cubes dense and cold — they act as little barriers between layers and stop the colors from mixing too quickly. I sometimes freeze water in silicone molds to get perfect cubes that don’t melt too fast.
Variations & Adaptations
One of the best things about this recipe is how easy it is to tweak for different tastes and occasions:
- Dietary Swap: Use honey or maple syrup instead of sugar for a natural sweetness boost. It changes the density slightly but still layers well if chilled properly.
- Seasonal Twist: Swap strawberries and blueberries for fresh raspberries and blackberries in late summer for a deeper berry flavor.
- Adult Version: Add a splash of vodka or gin to the lemonade layer for a grown-up twist. If you want a tropical flair, try a pineapple coconut mojito on the side.
- Flavor Boost: Add a few fresh basil leaves or lavender sprigs to the syrups while simmering for an herbal note that’s unexpectedly delightful.
- Color Swap: Replace the blue layer with a blueberry-lemonade blend for a softer gradient, similar to my blueberry lavender lemonade.
I once tried adding a little sparkling water on top for fizz, but it mixed the layers too soon — so that’s a fun option if you want a more blended, bubbly drink instead of the layered look.
Serving & Storage Suggestions
This lemonade is best served chilled and fresh, ideally poured over plenty of ice to keep the layers crisp and refreshing. If you’re serving a crowd, prepare the syrups and lemonade ahead, but assemble just before guests arrive to preserve the visual wow factor.
For a casual party, consider serving in clear mason jars or tall glasses so everyone can admire the layers before sipping. Add a lemon wheel or a sprig of mint for an easy garnish that brightens the presentation.
If you have leftovers (which is rare around here), store the syrups and lemonade separately in airtight containers in the fridge for up to 3 days. Stir before serving since the layers won’t stay intact once mixed.
Reheat the berry syrups gently if they’ve thickened too much in the fridge, but avoid boiling again to preserve fresh flavors. When reheated, the syrups are best stirred back into the lemonade for a tasty mixed drink rather than layering again.
Keep in mind the flavors meld and deepen after a day or two, so if you’re planning ahead, the mixed version has a different but still delicious profile.
Nutritional Information & Benefits
This Refreshing Red White and Blue Layered Lemonade is a lighter summer drink option compared to sodas or creamy beverages. Here’s a rough estimate per serving (1 glass):
| Calories | 120-150 kcal |
|---|---|
| Carbohydrates | 30-35 g (mostly from natural fruit sugars and added sugar) |
| Fat | 0 g |
| Protein | 0.5 g |
| Vitamin C | High (from fresh lemon juice and berries) |
The fresh lemon juice provides a good dose of vitamin C, supporting immunity and skin health, while berries add antioxidants and fiber. It’s gluten-free and vegan-friendly, making it suitable for a variety of dietary needs.
For those watching sugar intake, you can reduce the sugar or swap in natural sweeteners, but keep in mind that sugar helps maintain the layering density.
From my own experience, this lemonade feels like a refreshing pick-me-up on a hot day without weighing you down — a perfect balance between indulgence and health.
Conclusion
This Refreshing Red White and Blue Layered Lemonade Recipe isn’t just a pretty face — it’s an easy, tasty way to brighten up summer moments. Whether you’re craving a splash of color on a lazy afternoon or need a festive drink to impress friends, it delivers every time. The layers create a fun presentation, but it’s the fresh flavors and simple ingredients that make it stick with you.
Feel free to tweak the sweetness or fruit combos to match your taste buds — that’s part of the joy in making this drink your own. Honestly, it’s become a little ritual for me when summer rolls around, a way to slow down and savor something fresh and vibrant.
If you try this recipe, I’d love to hear how you made it your own or what occasions you served it for. Sharing those moments is what keeps recipes alive and fun. So go ahead, mix up a glass (or a pitcher!), and enjoy the burst of red, white, and blue in every sip.
FAQs
How do I keep the layers from mixing together?
Make sure each syrup is fully chilled before layering and pour slowly over the back of a spoon. Using dense ice cubes also helps separate the layers.
Can I make this lemonade in advance?
You can prepare the syrups and lemonade ahead, but assemble the layers just before serving to keep the colors distinct and fresh.
What can I substitute for sugar in this recipe?
Honey, agave syrup, or maple syrup can work, but keep in mind they may alter the layering because of different densities and sweetness levels.
Can this recipe be made alcoholic?
Absolutely! Adding vodka, gin, or a splash of your favorite clear spirit to the lemonade layer makes a fun adult version.
Are frozen berries okay to use?
Yes, frozen berries work well and save prep time. Just thaw slightly before simmering, and strain as usual for smooth syrup.
Pin This Recipe!
Refreshing Red White and Blue Layered Lemonade Recipe Easy 3-Layer Summer Drink

A visually stunning and easy-to-make layered lemonade featuring red strawberry syrup, classic lemonade, and blue blueberry syrup. Perfect for summer celebrations and casual get-togethers.
- Prep Time: 15 minutes
- Cook Time: 20 minutes
- Total Time: 35 minutes
- Yield: 4 servings 1x
- Category: Beverage
- Cuisine: American
Ingredients
- 1 cup fresh or frozen strawberries, hulled and sliced
- 2 tablespoons granulated sugar (adjust for sweetness)
- ½ cup water (for simmering strawberries)
- 1 cup freshly squeezed lemon juice (about 4–5 lemons)
- ¾ cup granulated sugar
- 4 cups cold water
- 1 cup fresh or frozen blueberries
- 2 tablespoons granulated sugar
- ½ cup water (for simmering blueberries)
- Ice cubes (lots!)
- Fresh mint leaves or lemon slices for garnish (optional)
Instructions
- Make the Red Strawberry Syrup: In a medium saucepan, combine 1 cup strawberries, 2 tablespoons sugar, and ½ cup water. Bring to a gentle simmer over medium heat, stirring occasionally. Cook for about 7 minutes until strawberries soften and mixture turns syrupy. Remove from heat.
- Strain the Red Syrup: Pour mixture through a fine mesh strainer into a bowl, pressing gently with a spoon to extract juice. Discard solids. Let syrup cool completely in the fridge (about 15 minutes).
- Prepare the Classic Lemonade (white layer): In a large pitcher, combine 1 cup freshly squeezed lemon juice, ¾ cup sugar, and 4 cups cold water. Stir until sugar dissolves. Chill in fridge while preparing blue layer.
- Make the Blue Blueberry Syrup: Repeat simmering process with 1 cup blueberries, 2 tablespoons sugar, and ½ cup water. Simmer for 7 minutes, mash berries lightly, then strain through mesh to remove solids. Chill syrup thoroughly.
- Assemble the Layers: Fill serving glass or pitcher with ice cubes to the top. Slowly pour red strawberry syrup first, about ⅓ of glass volume. Let settle for a minute.
- Carefully layer lemonade over back of a spoon to prevent mixing. Pour slowly to fill another third of glass. Allow layers to stay separate.
- Add blue blueberry syrup as top layer using same spoon technique. Three distinct red, white, and blue layers should be visible.
- Garnish and Serve: Add fresh mint leaves or a thin lemon wheel on top for freshness. Serve immediately for best visual effect and chilled taste.
Notes
Use ripe, sweet strawberries and fresh blueberries for best flavor. Frozen berries work well and save prep time. Chill syrups completely before layering to maintain distinct layers. Pour slowly over the back of a spoon to prevent mixing. Dense ice cubes help separate layers. For a lighter version, reduce sugar or use natural sweeteners like honey or agave syrup, but layering density may be affected. Garnish with fresh mint or lemon slices for added freshness.
Nutrition
- Serving Size: 1 glass
- Calories: 135
- Sugar: 30
- Sodium: 5
- Carbohydrates: 32.5
- Fiber: 2
- Protein: 0.5
Keywords: layered lemonade, summer drink, red white and blue drink, strawberry syrup, blueberry syrup, classic lemonade, refreshing beverage, patriotic drink