
The first time I tasted maple iced coffee, I swear the cozy flavors made me want to wrap up in a scarf, even though it was still technically summer. There’s just something about that sweet maple syrup swirling through cold, creamy coffee that instantly brings autumn to your kitchen—no crunchy leaves required. I actually stumbled onto this drink by accident when I ran out of vanilla syrup and, honestly, I’m so glad I did. That pure maple syrup adds a subtle, earthy sweetness that regular sugar just can’t.
If you’re anything like me, you might crave all those coffee shop autumn drinks, but don’t exactly love the price tag (or the heavy cream!). This maple iced coffee is my answer. It’s creamy, not too sweet, and you can make it with things you probably already have in your fridge. I’ve tested this recipe at least a dozen times—tweaking the coffee strength, playing with plant-based milks, and even trying it hot on a rainy morning. Every time, it’s a hit.
So whether you need a quick caffeine fix, want to impress brunch guests, or just love those fall flavors, this maple iced coffee recipe is for you. It’s easy, customizable, and, let’s face it, just plain delicious. If you’re a coffee lover (or even a maple syrup skeptic), give this one a try. Trust me, it’ll make your mornings feel just a little more special—and a lot more autumnal.
Why You’ll Love This Maple Iced Coffee Recipe
- Quick & Easy: Seriously, this comes together in about 5 minutes. No fancy equipment or barista skills needed—just stir, pour, and sip!
- Simple Ingredients: You probably have everything on hand—coffee, milk, maple syrup, ice. No trip to the specialty store required.
- Perfect for Anytime: It’s ideal for brisk fall mornings, lazy weekend brunches, or as an afternoon pick-me-up.
- Crowd-Pleaser: I’ve served this to friends, family, and even picky teenagers—everyone loves it, and some have even started making it at home.
- Unbelievably Creamy: The combo of milk (or cream) and real maple syrup creates a silky, rich texture you just don’t get with plain sugar or store-bought syrups.
What sets my maple iced coffee apart is the balance. Too often, coffee drinks are either cloyingly sweet or bitter and bland. Here, the maple syrup brings not just sweetness but a warm, almost caramel-like depth. Using brewed coffee (not espresso) keeps it smooth and mellow, so those lovely maple notes really shine through.
And let’s not forget the customization. You can use any milk you want, from whole to oat, and it’ll still taste amazing. Want it vegan? Easy. Want it extra-strong? Go for it. After dozens of experiments (and a couple of watery disasters), I’ve found this version nails that perfect creamy, fall-inspired flavor. It’s comforting, a little bit indulgent, and honestly feels like a hug in a glass.
When you take the first sip, you’ll know it’s not just another iced coffee. The maple hits first, then the smooth coffee, and finally that creamy finish—pure bliss. Whether you’re serving it for a cozy breakfast or sipping solo with a good book, this drink just brings a little extra joy to your day.
What Ingredients You Will Need
This recipe uses everyday ingredients to make a drink that feels special—without any fuss. Most of these are pantry staples, and there’s plenty of room for swaps if you’re out of something. Here’s what you’ll need for the perfect maple iced coffee:
- Freshly brewed coffee (strong, chilled) – About 1 cup (240 ml). The stronger, the better, so the flavor stands out with the ice and milk.
- Pure maple syrup – 1 to 2 tablespoons (15–30 ml), depending on your sweetness preference. Use 100% pure maple syrup for that classic, deep autumn flavor. I love using Vermont or Canadian maple syrup—Grade A Dark is my favorite for the richest taste.
- Milk or cream – 1/4 to 1/2 cup (60–120 ml). Whole milk, half-and-half, or heavy cream all work. For a dairy-free version, try oat milk or almond milk. Oat milk gives a silky texture, while almond keeps it light. (I’ve even tried coconut milk for a tropical twist—it’s delicious!)
- Ice cubes – Enough to fill your glass. Bigger cubes melt slower, but any kind works.
- Optional flavor boosters:
- Ground cinnamon – Just a pinch for extra warmth.
- Vanilla extract – 1/4 teaspoon (1 ml) for a creamy, bakery-style vibe.
- Whipped cream – Totally optional, but makes it feel like a coffee shop treat.
- Pinch of salt (optional) – Just a sprinkle can round out the flavors and make the maple pop.
If you’re missing something, don’t stress. Honey or agave can substitute for maple syrup, though you’ll miss a bit of that fall magic. Any coffee works—cold brew, leftover morning coffee, even instant in a pinch (just make it extra strong). Use what you like and what you have!
For maple syrup, I find darker grades offer a more pronounced flavor. If you can, avoid the pancake syrup blends—they’re mostly corn syrup and don’t give the same cozy taste. If you’re dairy-sensitive, unsweetened almond or oat milk is my top pick. And if you want a protein boost, add a splash of vanilla protein shake instead of milk—trust me, it’s amazing post-workout.
Equipment Needed
- Coffee maker or French press: Any way you brew your coffee works. I use a French press for extra-strong flavor, but a drip coffee maker does the trick, too.
- Measuring spoons and cup: For getting just the right amount of syrup and milk. I eyeball it sometimes, but measurements help keep things consistent.
- Stirring spoon or small whisk: To blend the maple syrup evenly into the coffee. I’ve used a milk frother for extra creaminess—it’s totally optional, but fun!
- Tall glass: Any sturdy glass works. Mason jars are cute and hold a lot of ice.
- Ice cube tray: If you want to get fancy, freeze coffee instead of water for extra-strong, never-watered-down drinks.
If you don’t have a coffee maker, instant coffee or cold brew concentrate are quick backups. A regular spoon works for stirring, but if you’re a gadget lover, a handheld frother adds a foamy top. I’ve even used a cocktail shaker in a pinch to mix everything super well (just watch for leaks!). For cleanup, glassware is easiest, but stainless steel tumblers keep your drink cold longer if you’re sipping slowly.
How to Make Maple Iced Coffee (Step-by-Step)
-
Brew your coffee.
Brew 1 cup (240 ml) of strong coffee using your preferred method. If possible, double the grounds for a bolder flavor. Let it cool to room temperature or chill it in the fridge for 10–15 minutes. (Hot coffee melts ice too fast!)
Tip: If you’re short on time, pour hot coffee over a cup of ice to cool it quickly, but be prepared for a little dilution.
-
Prepare your glass.
Fill a tall glass with ice cubes—enough to reach nearly the top. (I like using coffee ice cubes to avoid watering down the drink.)
-
Add the maple syrup.
Pour 1–2 tablespoons (15–30 ml) of pure maple syrup directly over the ice. If you’re unsure, start with less—you can always add more to taste.
-
Pour in the coffee.
Slowly pour your chilled coffee into the glass, covering the ice and syrup. Give it a good stir so the syrup dissolves completely. (Sometimes the syrup settles on the bottom, so don’t skip this step.)
Troubleshooting: If your syrup clumps, your coffee might be too cold. Stir a bit longer, or add the syrup to slightly warm coffee first, then pour over ice.
-
Add your milk or cream.
Pour in 1/4 to 1/2 cup (60–120 ml) of your favorite milk or cream. Watch those creamy swirls mix with the coffee—it’s mesmerizing! Stir gently to combine.
Note: For layered presentation, pour milk over the back of a spoon for a pretty effect before stirring.
-
Flavor it up (optional).
Add a pinch of cinnamon, 1/4 teaspoon (1 ml) vanilla extract, or a tiny pinch of salt if you want extra depth. Stir again.
-
Garnish and serve.
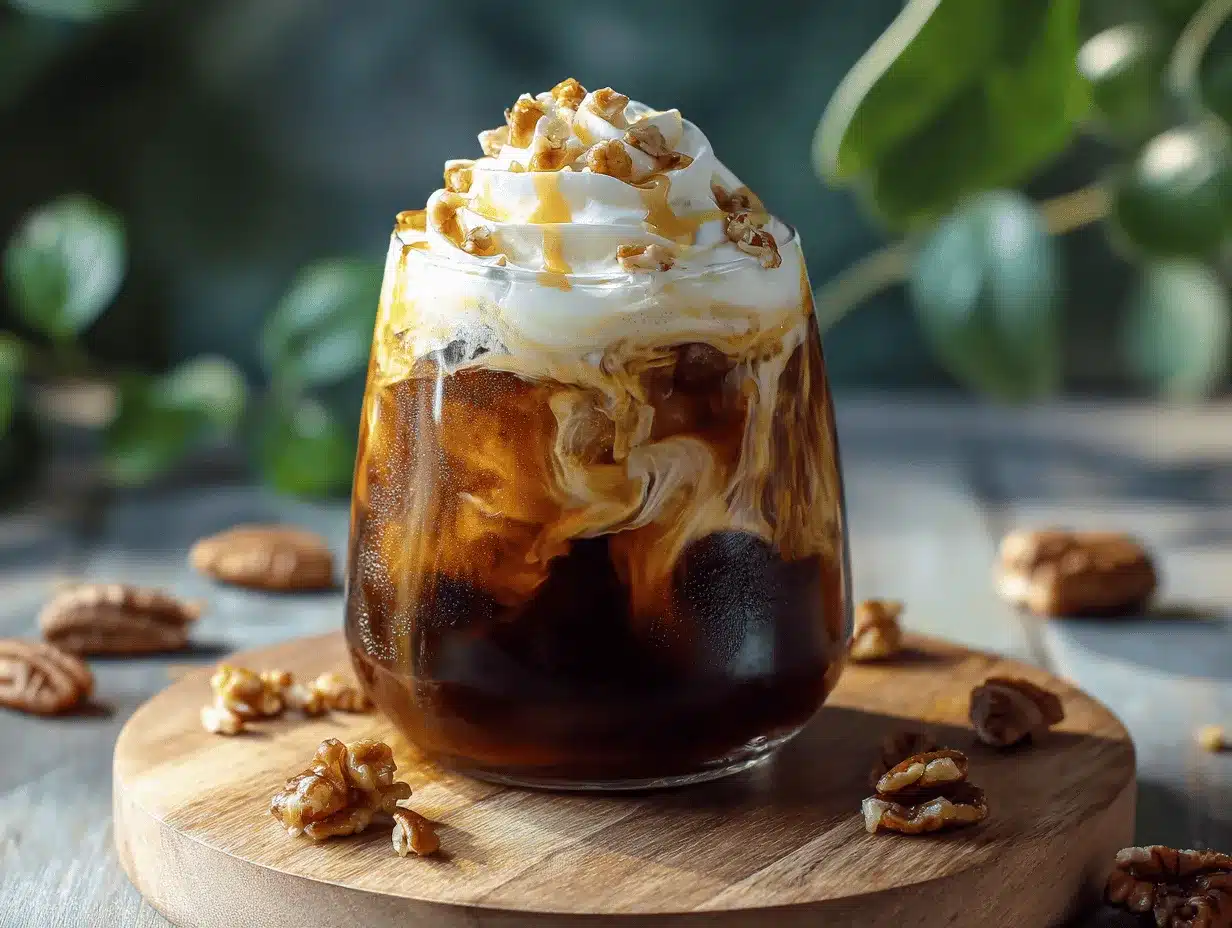
If you’re feeling fancy, top with whipped cream and a little drizzle of maple syrup. Insert a reusable straw and enjoy immediately!
Personal Tips: I often make a big batch of chilled coffee on Sundays, so I can whip up maple iced coffee all week. If you want to avoid watery drinks, freeze leftover coffee in an ice tray. And don’t be afraid to adjust the sweetness—some days, I use half the syrup for a lighter touch, especially if my milk is already sweetened.
Cooking Tips & Techniques for the Best Maple Iced Coffee
After making this maple iced coffee more times than I care to admit, I’ve picked up some tricks that make a huge difference. First, always use chilled coffee. Trying to shortcut with hot coffee just results in a watery, lukewarm drink. If you’re in a rush, use coffee ice cubes—total game changer for flavor!
Don’t skimp on the quality of your maple syrup. I once tried using pancake syrup when I ran out of the real stuff, and the result was just…meh. For that deep, autumn flavor, 100% pure maple syrup is key.
The milk matters, too. Whole milk or oat milk gives the creamiest texture, but if you love a richer drink, a splash of half-and-half is dreamy. If you go for plant-based, choose a barista blend for the best froth and consistency.
Mixing is more important than you think. If the syrup isn’t fully dissolved, you’ll get an overly sweet mouthful at the end. I like to stir the syrup with just the coffee first, then add ice and milk for even distribution.
If you’re making this for a crowd, you can pre-mix the coffee, syrup, and milk in a pitcher and serve over ice. Just give it a good stir before pouring. And don’t forget, taste as you go—everyone’s sweetness preference is different.
Lastly, don’t be afraid to experiment! I once tossed in a shot of espresso for an extra kick or swapped in cinnamon oat milk for a spiced twist. If you mess up and it’s too sweet, add more coffee. Too strong? Add a little more milk. Maple iced coffee is forgiving, so play around until it’s your perfect fall sip.
Variations & Adaptations
One of the best things about maple iced coffee is how easy it is to customize. Here are some of my favorite ways to switch things up:
- Dairy-Free/Vegan: Use unsweetened almond, oat, or coconut milk. For extra creaminess, try a splash of coconut cream or a barista-style oat milk.
- Protein Maple Iced Coffee: Add 1/4 cup (60 ml) vanilla protein shake instead of milk for a post-workout treat. It makes the drink extra creamy and filling.
- Spiced Maple Iced Coffee: Sprinkle in a pinch of pumpkin pie spice or ground nutmeg along with the cinnamon for that classic fall coffee shop flavor.
- Decaf Option: Brew your favorite decaf coffee if you want to enjoy this drink in the evening or are sensitive to caffeine.
- Hot Maple Coffee: Skip the ice and use hot, freshly brewed coffee. Add the maple syrup and milk, stir, and top with frothy milk foam for a cozy winter version.
If you have nut allergies, stick with dairy milk or try rice milk. For a sugar-free option, use a sugar-free maple syrup substitute—it’s not quite the same, but still tasty. I once made a mocha variation by adding a teaspoon of cocoa powder (dissolved in a bit of hot coffee first)—it was like a maple mocha dream!
Don’t be afraid to play with the ratios, either. Some mornings, I want a stronger coffee flavor, so I use less milk. On lazy weekends, I go heavy on the maple for a dessert-in-a-glass vibe. It’s all about making maple iced coffee your own.
Serving & Storage Suggestions
Maple iced coffee is best served cold, right after you make it. I like to use a tall glass piled high with big ice cubes (they melt slower!). For a Pinterest-worthy look, drizzle a little maple syrup down the inside of the glass and finish with a swirl of whipped cream and a sprinkle of cinnamon.
This drink pairs beautifully with cinnamon rolls, pumpkin bread, or even a toasted bagel. For brunch, serve alongside quiche or fresh fruit for a balanced spread. If you want to get fancy, try matching it with maple-bacon scones—total fall heaven.
If you need to prep ahead, mix the coffee, maple syrup, and milk together in a pitcher and store in the fridge for up to 2 days. Don’t add ice until serving so it doesn’t get watered down. For leftovers, just give it a good shake or stir—sometimes the syrup settles. If you want to freeze, pour the mixture into ice cube trays and blend with fresh coffee later for a frosty treat.
As the flavors sit together, the maple notes deepen, so day-old maple iced coffee can taste even richer. Just give it a good stir before drinking, and you’re good to go!
Nutritional Information & Benefits
Here’s the rundown for one serving of maple iced coffee (made with whole milk and 1 tablespoon maple syrup):
- Calories: ~120
- Sugar: ~13g (mostly from maple syrup)
- Protein: ~3g
- Fat: ~4g
- Caffeine: ~95mg (depending on coffee strength)
Maple syrup isn’t just for sweetness—it brings minerals like manganese and zinc, and is lower-glycemic than regular sugar. Using plant-based milks can cut calories and saturated fat. If you need to watch sugar, halve the maple syrup or use a sugar-free alternative.
This recipe is naturally gluten-free and adaptable for dairy-free or vegan diets. If you have nut allergies, go with dairy or rice milk. Remember, coffee is a good source of antioxidants, and a bit of maple adds a touch of natural goodness. For me, it’s a treat that feels indulgent but isn’t over the top—just right for a balanced fall pick-me-up.
Conclusion
If you love all things coffee and crave those cozy fall flavors, this maple iced coffee is honestly a must-try. It’s easy, quick, and so much better (and cheaper!) than most coffee shop versions. I love how customizable it is—you can make it dairy-free, extra-strong, or even a little bit decadent, depending on your mood.
Honestly, this recipe has become my go-to for chilly mornings and lazy afternoons alike. I hope it brings a little joy and comfort to your day, too. Don’t be afraid to tweak the ratios, swap the milk, or add your own twist—make it yours!
If you try this maple iced coffee recipe, let me know how it turns out in the comments. Share your favorite variations or tag me on social media with your beautiful creations. Here’s to fall flavors, creamy coffee, and simple pleasures—cheers!
Frequently Asked Questions
How can I make maple iced coffee without dairy?
Easy! Just use your favorite plant-based milk—oat, almond, or coconut all work great. Barista blends make it extra creamy, but any will do.
Can I use instant coffee for this recipe?
Absolutely. Just dissolve two teaspoons of instant coffee in 1 cup (240 ml) hot water, then chill before using. It’ll work in a pinch.
Is maple syrup healthier than regular sugar?
Maple syrup is less processed and contains some minerals, but it’s still a sweetener—so use it in moderation. It does provide a unique flavor regular sugar can’t match!
What’s the best coffee strength for maple iced coffee?
Go strong! Double the amount of grounds you’d normally use, or brew your coffee extra bold. This way, the coffee flavor doesn’t get lost with the ice and milk.
Can I make maple iced coffee ahead of time?
Yes, you can mix the coffee, milk, and maple syrup together and keep it in the fridge for up to two days. Just don’t add ice until you’re ready to serve, so it stays nice and strong.
Pin This Recipe!

Maple Iced Coffee

This easy maple iced coffee recipe combines strong brewed coffee, pure maple syrup, and creamy milk for a cozy, fall-inspired drink you can make at home in minutes. It’s customizable, naturally gluten-free, and perfect for coffee lovers craving autumn flavors.
- Prep Time: 5 minutes
- Cook Time: 0 minutes
- Total Time: 5 minutes
- Yield: 1 serving 1x
- Category: Drinks
- Cuisine: American
Ingredients
- 1 cup (240 ml) strong brewed coffee, chilled
- 1 to 2 tablespoons (15–30 ml) pure maple syrup
- 1/4 to 1/2 cup (60–120 ml) milk or cream (whole milk, half-and-half, heavy cream, or plant-based milk like oat or almond)
- Ice cubes (enough to fill a tall glass)
- Optional: pinch of ground cinnamon
- Optional: 1/4 teaspoon (1 ml) vanilla extract
- Optional: whipped cream, for topping
- Optional: pinch of salt
Instructions
- Brew 1 cup (240 ml) of strong coffee using your preferred method. Let it cool to room temperature or chill in the fridge for 10–15 minutes.
- Fill a tall glass with ice cubes, nearly to the top.
- Pour 1–2 tablespoons (15–30 ml) of pure maple syrup over the ice.
- Slowly pour the chilled coffee into the glass, covering the ice and syrup. Stir well to dissolve the syrup.
- Add 1/4 to 1/2 cup (60–120 ml) of your favorite milk or cream. Stir gently to combine.
- If desired, add a pinch of cinnamon, 1/4 teaspoon vanilla extract, or a pinch of salt for extra flavor. Stir again.
- Top with whipped cream and a drizzle of maple syrup if desired. Serve immediately with a straw.
Notes
For best results, use 100% pure maple syrup (Grade A Dark for richer flavor). Chilled coffee prevents dilution; coffee ice cubes are a great option. Adjust maple syrup and milk to taste. For a vegan version, use oat or almond milk. To make ahead, mix coffee, syrup, and milk in a pitcher and refrigerate for up to 2 days (add ice when serving).
Nutrition
- Serving Size: 1 tall glass (about 12–16 oz)
- Calories: 120
- Sugar: 13
- Sodium: 50
- Fat: 4
- Saturated Fat: 2.5
- Carbohydrates: 18
- Protein: 3
Keywords: maple iced coffee, fall coffee drink, maple syrup coffee, iced coffee recipe, dairy-free coffee, vegan coffee, autumn drinks, easy coffee recipe, homemade iced coffee, creamy iced coffee